


Multi Effects Pedal article
Multi Effects Pedal for Beginners: A Complete Guide

A multi-effects pedal is where your tone truly comes alive—one box holding distortion, reverb, delay, modulation and amp sounds that used to fill entire venues. As a beginner, a multi-effects unit lets you explore every effect you've heard on records without buying five separate pedals and wrestling with cables. This guide cuts through the technical jargon and shows you exactly what happens inside the box, how to start using one and why beginners often get more from a multi-FX than from individual pedals.
What Happens Inside: Three Systems Working Together
Think of a multi-effects pedal as three computers in one box. The first is the effects processor—it holds distortion, overdrive, compression, wah, chorus, flanger, phaser, tremolo, delay and reverb, all waiting for you to turn them on or off. The second is the amplifier simulator—it digitally models how a real guitar amplifier sounds, so you get a huge amp tone from a tiny unit. The third is the control brain—it remembers your settings, stores them as presets and lets you switch between them instantly.
When you plug your guitar into a multi-effects unit, the signal travels through these three systems and comes out sounding bigger, richer and more controllable than plugging straight into an amplifier. You're not just adding effects—you're adding the character of professional gear that would cost thousands of pounds to buy separately.
Compact Pedals Versus Floorboards: Where to Start
Compact multi-effects units like the Line 6 HX Stomp or BOSS ME-50 are about the size of a shoebox and weigh under 3 kilograms. Perfect for beginners who want to start exploring effects without taking over their pedalboard. They plug into your existing amplifier, offer hundreds of effects and cost between £300 and £600. For most beginners, a compact unit is exactly right—enough power to explore everything without overwhelming you.
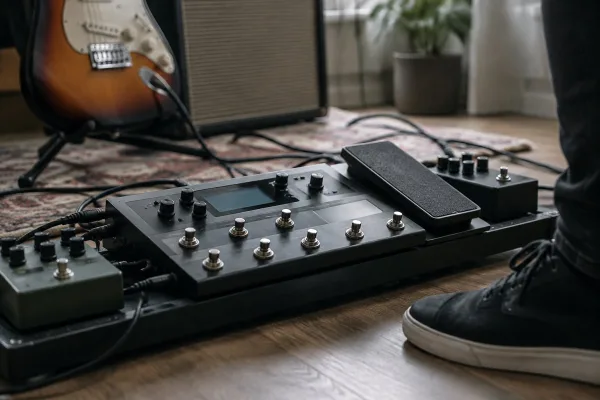
Floorboards are bigger units designed to replace your entire rig. They look intimidating at first because they have more buttons and footswitches than a compact pedal. If you're just starting, skip the floorboard. Master a compact unit first. Once you've fallen in love with effects and understand signal routing, then consider stepping up to a floorboard when your playing demands it.
Your First Preset: Start Simple, Build Gradually
When you first power on a multi-effects pedal, you'll likely see a preset screen with dozens of pre-built configurations already loaded. Don't panic. Start by playing through a few presets to hear what effects sound like. Listen to distortion presets, then reverb presets, then delay presets. Get a feel for what each effect does.
Then create your first custom preset by starting with nothing. Plug in your guitar and add effects one at a time. Start with a distortion or overdrive block. Play with it until you like it. Then add a delay. Notice how delay repeats your notes. Add reverb and hear space open up around your tone. Build gradually. Many beginners load thirty effects into one preset, turn them all on and wonder why everything sounds like soup.
Understanding Effects Order and Signal Flow
The order you stack effects matters. There's a common starting order that works brilliantly for most players: tuner, compressor, wah or filter, then distortion or overdrive, then modulation (chorus, flanger, phaser), then delay and reverb last.
Why this order? Compression sits first to shape your signal before anything else touches it. Wah needs clean signal or it sounds muddy. Distortion needs clean signal to sound crisp and tight. Modulation goes after distortion so it sounds like it's modulating distorted tone, not clean tone. Delay and reverb go last so they affect your entire final signal, creating space around everything.
Don't treat this as a rule carved in stone. Some players put modulation before distortion for psychedelic textures. Some run delay into distortion for screaming feedback. The point is: understand that order matters and experiment.
Presets: The Magic Ingredient for Live Performance
A preset is a snapshot of all your settings—which effects are on, their exact settings, amp model, volume, everything. Press one button and instantly jump from a clean tone to crunch to lead to ambient soundscape. This is where multi-effects pedals truly excel. You could spend ten minutes tweaking knobs on individual pedals to switch between sounds. A multi-effects pedal does it in a footswitch press.
Save presets for each song you play. Call them something memorable—"Song 1 Clean," "Song 1 Verse," "Song 1 Chorus." Set them up at soundcheck so when you're mid-set and adrenaline is pumping, your hands remember the footswitch sequence by muscle memory.
Basic Troubleshooting: Common Beginner Mistakes
If your tone sounds thin or weak, check your input gain. Most multi-effects units require careful gain staging—setting the input level so the unit hears a healthy signal without clipping. Too quiet and everything sounds thin. Too loud and the digital processing gets angry and distorted. Aim for the input meter showing about three-quarters full without hitting the red zone.
If everything sounds too loud or soft, check your output level. Most units have both input and output volume controls. Set the output level to unity (0 dB) and use your amplifier's volume knob to control overall loudness.
If effects sound harsh or muddy, you've probably turned on too many effects at once. Start fresh with a blank preset, add one effect at a time and listen. Learn what each effect does before layering them.
Connecting to Your Amplifier: Two Common Methods
Easiest method: run the multi-effects output straight into your amplifier's front input. Your amp acts as the speaker and volume control. This works brilliantly for beginners and gives you immediate feedback about your tone.
Intermediate method: use the four-cable method if your amplifier has an effects loop. This puts compression and distortion effects in front of the amp's preamp and modulation, delay and reverb in the effects loop afterwards. More control, but adds complexity. Master the simple method first, graduate to the four-cable method when you're ready.
Learning Effects One at a Time: Build Your Toolkit
Spend a full practice session with just distortion. Learn how it responds to picking dynamics, how drive and tone controls shape it. Then spend a session with reverb—learn the difference between room, plate and hall reverbs. Then delay—learn short delays for slap-back echoes and long delays for ambient textures. This methodical approach builds genuine understanding instead of creating a giant effect salad.
Once you understand individual effects, layer them. Now reverb on distortion sounds completely different than distortion on reverb. Delay before modulation creates rhythmic textures. Distortion into reverb creates surf-rock tension and release. Understanding how effects interact comes from playing with them, not reading about them.
Headphones and Silent Practice: The Secret Superpower
Most multi-effects units include a headphone output. Plug in headphones and practice silently. Hear your full signal—amp model, effects, everything—without amplifier volume limiting your hearing or bothering housemates. This transforms how fast you learn effects and how clearly you hear tone shaping.
Many multi-effects units let you create separate presets for headphones and amplifier output. Lower the reverb in headphone presets because headphone reverb accumulates weirdly in your ears. Build amp presets with more reverb because physical speaker reverb differs from headphone reverb. Small tweaks but they make huge differences.
Conclusion: Start Simple and Explore Your Tone
A multi-effects pedal is your gateway to tone exploration and sonic creativity. Start with a compact unit, create simple presets with one or two effects, learn how effects interact and gradually build more complex configurations as your understanding deepens. Use presets to switch between songs instead of twiddling knobs on stage. Practice with headphones to isolate your tone from amplifier volume. Most importantly, enjoy the journey. You're not just playing guitar—you're sculpting sound.





Comments