


Monitor Speaker Stand article
Monitor Speaker Stand for Beginners: A Complete Guide
Proper monitor speaker stands position your speakers at ear level for accurate mixing. This beginner guide covers types, setup, budget options, and why they're essential for home recording.
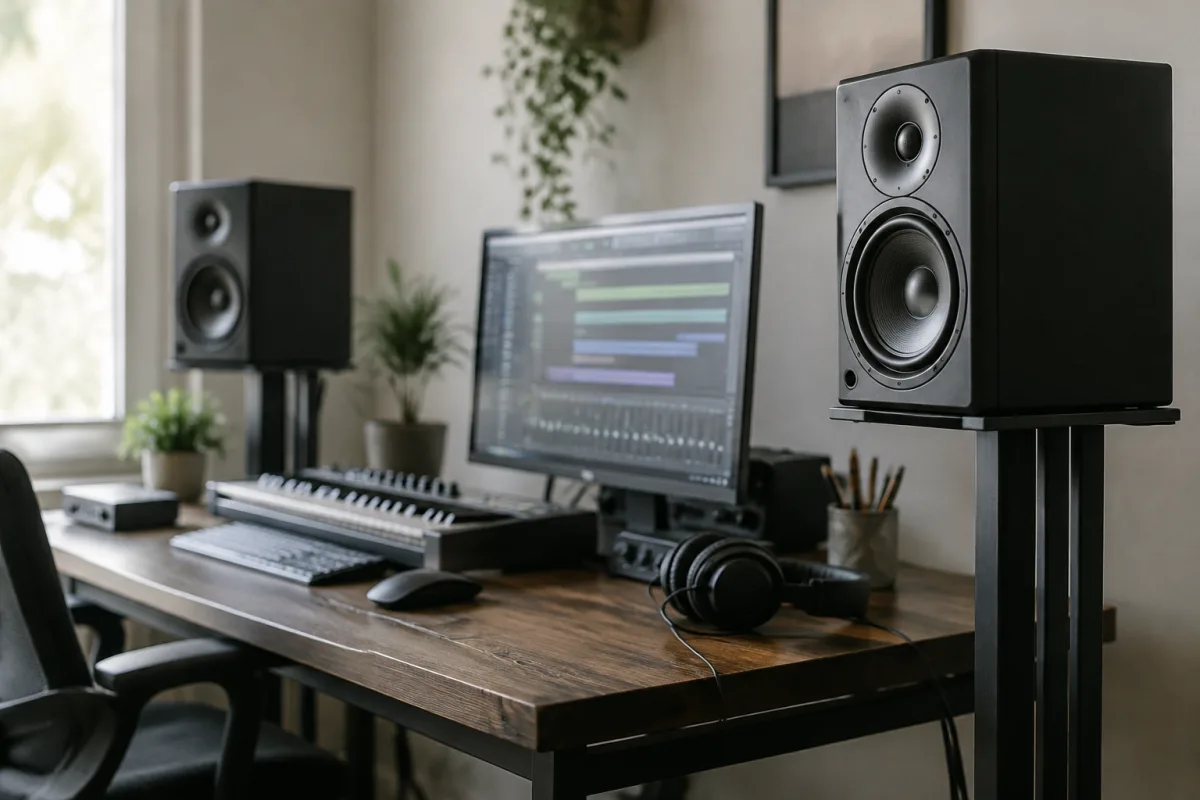
If you're setting up a home recording studio for the first time, you've probably bought some monitor speakers and placed them on your desk, shelf, or floor. That's a starting point, but it's not ideal for accurate sound reproduction or comfortable mixing. Proper monitor speaker stands transform your recording experience by positioning your speakers at ear level, isolating them from vibrations, and improving the acoustic accuracy you depend on for good mixes. This beginner's guide explains why monitor speaker stands matter, which types work for home studios, how to set them up correctly, and whether you need one right now. No technical jargon—just practical information to help you make an informed decision.
Why Do Home Recording Studios Need Monitor Stands?
Monitor speaker stands serve several important purposes, all related to how sound reaches your ears accurately. First, they position speakers at ear level when you're seated, which is crucial for hearing the true stereo image and frequency balance of your mix. Speakers on a desk or floor produce sound that doesn't reach your ears evenly—bass frequencies travel down, treble frequencies travel up, and you get a skewed impression of your mix. Second, stands isolate your speakers from the desk or floor, preventing vibrations from transferring into your furniture and muddying the sound. Third, they keep speakers away from reflective surfaces (like a desk or wall), which cause sound reflections that confuse your ear during mixing. Fourth, they position speakers for optimal acoustic treatment, helping your room sound more balanced. None of these are optional considerations if you want to mix accurately.
Many beginner producers make the mistake of mixing on speakers that aren't properly positioned, then wonder why their mixes sound thin, bassy, or unbalanced when they play on other systems. Better speaker positioning fixes a huge portion of that problem.
Understanding Monitor Speaker Stand Types
Monitor speaker stands come in several varieties, each suited to different studio setups and budgets:
- Isolation pad stands: Simple platforms with foam isolation pads built in. Usually £40–£80 per pair. These decouple speakers from desks and reduce vibration transfer. Good for beginners on tight budgets, but don't adjust height.
- Height-adjustable stands: Metal tripod or pole stands that raise speakers to ear level and adjust for different room heights. Typically £60–£150 per pair. The most popular choice for home studios because they're adjustable and effective.
- Desk stands: Compact stands designed to sit on desks without taking floor space. Usually £50–£120 per pair. Useful if you have limited room but want proper positioning.
- Wall-mounted stands: Bracket systems that mount speakers directly to walls. Typically £40–£100 per pair. Great for fixed setups where you won't rearrange frequently.
- Speaker platforms or isolation blocks: Rigid platforms with decoupling feet, placed on desks or floors. Usually £30–£70 per pair. A budget-friendly option, though they don't adjust height.
For a beginner home studio, height-adjustable stands (£60–£150 per pair) offer the best balance of affordability, adjustability, and acoustic benefit.
Setting Up Your Monitors Correctly
Proper setup is the difference between accurate mixing and struggling with poor positioning. Here's how to do it right:
Step 1: Position for an equilateral triangle. Your two monitor speakers and your head should form an equilateral triangle. If you sit 1 meter from each speaker, the speakers should be roughly 1 meter apart. This creates even stereo imaging and balanced sound.
Step 2: Raise speakers to ear level. When sitting in your mixing chair, the tweeter (the small high-frequency speaker) should be at ear height or slightly above. Too low and you miss treble detail; too high and frequencies become unbalanced. Most people need speakers 60–90cm high from floor to tweeter.
Step 3: Angle speakers slightly inward. Point the front of each speaker toward your mixing position, not straight ahead. This focuses the stereo image at your ears, not across the room.
Step 4: Keep speakers away from walls. Ideally, position them at least 30cm from the nearest wall to avoid bass buildup and reflections. If your room is small, this is sometimes impossible—do your best.
Step 5: Use isolation pads. Place isolation feet or pads under each speaker to decouple them from stands or desks. This reduces vibration transfer and tightens the low end.
Step 6: Check for vibration travel. Put your hand on your desk or floor with speakers on. You shouldn't feel significant vibration. If you do, improve isolation or move the speakers further from the surface.
Budget Options for Beginners
You don't need expensive stands to get decent results. Here's what actually works:
- Budget height-adjustable stands (£60–£100 per pair): Brands like Amazon Basics, Neumann, or Gear4Music offer solid entry-level stands. They work perfectly fine for home studios.
- Used stands on eBay or Reverb (£40–£70 per pair): Save money buying secondhand. Most stands last years, so used ones offer great value.
- Isolation pad add-ons (£20–£40): If you already have stands or platforms, foam isolation pads under speakers provide significant acoustic improvement cheaply.
Avoid DIY solutions like stacked books or PVC pipes for speaker stands—they're unstable and unsafe. Spend the money on proper stands; it's worth it for both safety and sound quality.
Common Beginner Mistakes With Monitor Stands
Mistake 1: Placing speakers on the desk without stands. Your desk vibrates and colors your mix. Even isolation pads on a desk are suboptimal. Proper stands are not optional if you're serious about mixing.
Mistake 2: Not positioning speakers at ear level. This is the most common mistake. Beginners leave speakers on shelves or low stands. Move them up. Ear level is non-negotiable.
Mistake 3: Ignoring the equilateral triangle rule. Asymmetrical speaker positioning creates unbalanced stereo imaging. You'll make panning and stereo width decisions that don't translate to other systems.
Mistake 4: Pointing speakers away from the listening position. Some beginners angle speakers to avoid reflections but end up facing them the wrong direction. Point them toward your ears, always.
Mistake 5: Skipping isolation pads to save money. Isolation pads are cheap (£20–£40) and dramatically improve sound. Never skip them. They're one of the best investments you can make.
Mistake 6: Stacking speakers on top of each other. This destroys stereo imaging and makes mixing impossible. Always place them side by side at equal heights.
Testing Your Setup
Once you've positioned your monitors on stands, test the setup by playing familiar songs you know well—music you've heard on high-quality systems. Does it sound balanced? Can you hear details in the vocals, instruments, and bass? Does the stereo image feel centered and wide? Adjust speaker height and positioning until it sounds right. Trust your ears and a few reference songs.
Moving Forward With Your Studio
Monitor speaker stands are one of the most impactful upgrades you can make in a home studio. They don't cost much (£100–£200 for a quality pair), they're easy to set up, and they immediately improve your mixing accuracy. If you're serious about recording or producing music, they're not optional. For deeper information about monitor speaker stands, room acoustic treatment, and studio setup best practices, read our complete guide to monitor speaker stands.
Right now, focus on positioning: ear level, equilateral triangle, proper isolation. Those three elements transform your listening environment. Everything else is refinement. Get started today, and you'll hear the difference in your mixes immediately.


Comments