


Presonus Studio Monitors Buying guide
Presonus Studio Monitors: A Complete Buyer's Guide
A practical guide to selecting the right PreSonus studio monitors for your room and budget. Understand size options, key specifications, and how to optimise your monitoring setup.
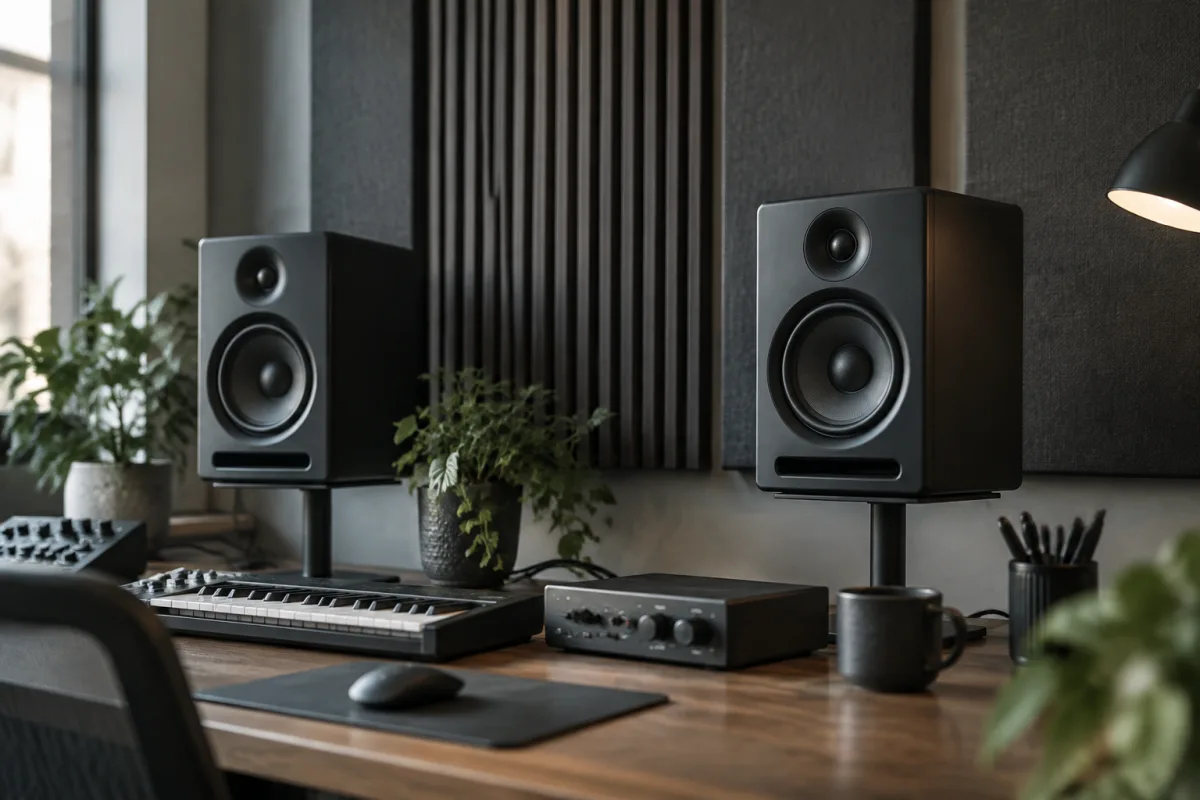
PreSonus has built a strong reputation for delivering quality studio monitors at competitive prices, making them a popular choice for home producers, small professional studios, and content creators. If you're considering PreSonus studio monitors for your setup, you need to understand which models fit your room size and budget, what specifications genuinely matter for your application, and how to avoid the common mistakes that lead buyers to purchase incorrectly. This guide walks you through the buying process with practical advice tailored to your specific needs.
PreSonus Studio Monitor Range and Product Tiers
PreSonus manufactures several lines of studio monitors, from budget-friendly entry-level models to professional-grade systems. Understanding where each product tier sits helps you choose appropriately for your needs and budget. Entry-level PreSonus studio monitors deliver solid performance for home studios and learning. Mid-range models offer professional quality at reasonable prices, making them popular with independent musicians and semi-professional studios. Premium PreSonus studio monitors target professional mixing and mastering facilities where every detail matters.
Your budget should guide your selection, but remember that a smaller, well-positioned pair of budget PreSonus studio monitors often outperforms larger professional models placed poorly or in untreated rooms. Price alone doesn't determine whether PreSonus studio monitors will improve your work.
Choosing the Right Monitor Size
PreSonus produces studio monitors in several woofer sizes: 4-inch, 5-inch, 6-inch, and 8-inch configurations. Selecting the right size for your room is the most important decision you'll make.
4-Inch PreSonus Studio Monitors: Compact models ideal for small rooms (under 12 square metres), desktops, or space-constrained environments. These are affordable, take minimal space, and handle most mixing tasks adequately. The trade-off is bass accuracy—frequencies below 80 Hz become less reliable, which can be problematic if you mix music with significant low-end content. Choose 4-inch PreSonus studio monitors only if your room is genuinely compact and you're willing to check your bass decisions on headphones.
5-Inch PreSonus Studio Monitors: The versatile middle ground, suitable for rooms from 12 to 25 square metres. A 5-inch woofer reproduces bass accurately enough for most mixing applications (down to around 50 Hz), fits comfortably in typical home studios, and remains affordable. Most home producers find 5-inch PreSonus studio monitors ideal for their needs. They're the safest choice for beginners deciding on their first proper monitoring system.
6-Inch PreSonus Studio Monitors: A middle ground between 5-inch and 8-inch models, useful for rooms 20–35 square metres. Six-inch PreSonus studio monitors offer more bass extension than 5-inch models without the size and cost of 8-inch options. Consider these if your room is larger than typical and you mix bass-heavy material frequently.
8-Inch PreSonus Studio Monitors: Professional-grade monitors for large rooms (30+ square metres) and serious commercial facilities. Eight-inch woofers provide extended bass response and higher SPL capabilities. Only choose 8-inch PreSonus studio monitors if your room is genuinely spacious and professionally treated. In small rooms, they create bass accumulation problems that oversized monitors can't overcome.
Be conservative with monitor size selection. Many buyers purchase monitors too large for their rooms and then struggle with acoustic problems. Start with 5-inch PreSonus studio monitors unless you have specific reasons to go larger.
Key PreSonus Studio Monitor Specifications
Wattage and Amplifier Power: PreSonus studio monitors typically include amplifiers ranging from 40 to 200 watts. More power provides better headroom at high volumes and cleaner sound at modest levels. For home studios, 50–100 watts is adequate. Higher wattage is unnecessary for most applications and simply adds cost. Don't assume higher wattage means better PreSonus studio monitors.
Frequency Response: PreSonus publishes frequency response ranges for their monitors, typically extending to 40–50 Hz at the low end. However, this specification alone is misleading. What matters is flatness (neutral response), not just how low the range extends. A PreSonus studio monitor with a bumpy, coloured frequency response is useless for mixing, even if its specifications impress.
Signal-to-Noise Ratio (SNR): PreSonus studio monitors typically achieve SNR values around 100 dB or better. This is excellent for any monitoring application. Don't stress over exact numbers—any modern PreSonus studio monitor offers acceptable noise performance.
Maximum SPL (Sound Pressure Level): Look for at least 100 dB SPL for comfortable mixing levels. Higher SPL capacity isn't necessary for home studios and actually indicates less refined amplifier design in some cases. A PreSonus studio monitor that handles loud volumes without distortion at reasonable output levels is more valuable than one that pushes extreme SPL uncomfortably.
Application-Specific Guidance
For Music Mixing and Production: Choose 5-inch PreSonus studio monitors in a treated room. Pair them with acoustic panels and bass traps for accurate frequency response. This combination delivers professional-quality monitoring without excessive expense. Most independent musicians achieve excellent mixes using 5-inch PreSonus studio monitors properly positioned.
For Electronic Music and Bass-Heavy Genres: Consider 6-inch PreSonus studio monitors or pair 5-inch models with a subwoofer. Bass decisions are critical in electronic production, and extended low-frequency monitoring helps you make confident mixing choices. A subwoofer adds flexibility—you can toggle it on or off to check bass decisions against your monitors alone.
For Podcasting and Voiceover: Any PreSonus studio monitors work adequately for monitoring dialogue. Budget 4-inch or 5-inch models are perfectly sufficient. Your priority is clear midrange reproduction and reliable operation, not bass extension. Save money on PreSonus studio monitors and invest in a quality microphone and preamp instead.
For Mastering and Critical Listening: Mid-range to professional PreSonus studio monitors (6-inch or 8-inch) in a properly treated room suit mastering work. Mastering demands precision that budget PreSonus studio monitors can't always provide. Expect to invest in quality monitors and professional acoustic treatment.
PreSonus Studio Monitor Connectivity and Setup
Most modern PreSonus studio monitors feature XLR inputs (industry standard) and RCA inputs for flexibility. Newer models may include USB or optical digital inputs. Verify your PreSonus studio monitors support the outputs on your audio interface before purchasing—this prevents frustration during setup.
Power requirements are typically 100–240 volts, so PreSonus studio monitors work globally. Check local voltage specifications if you're purchasing abroad. Setup is straightforward: connect audio cables from your interface, plug in power, and adjust input gain. No special installation skills are required for most users.
Budget Ranges and Value Assessment
Entry-Level (£200–£500 per pair): Budget PreSonus studio monitors deliver decent accuracy for hobbyists, students, and beginners. Sound quality is significantly better than consumer speakers but limited for professional work. Acceptable for learning production basics and recording home projects.
Mid-Range (£500–£1,200 per pair): Professional-quality PreSonus studio monitors at this price offer accuracy, reliability, and build quality suitable for serious production work. This is excellent value and where most successful independent producers invest. PreSonus consistently delivers quality in this price tier.
Premium (£1,200+ per pair): High-end PreSonus studio monitors target professional facilities and mastering engineers. The sonic and build quality improvements over mid-range models are subtle—you're paying primarily for refinement and longevity. Only necessary if you're running a professional facility.
Critical Buying Mistakes to Avoid
Choosing Size Without Measuring Your Room: Many buyers select PreSonus studio monitors based on appearance or brand without considering room size. Oversized monitors in small rooms create bass problems that ruin the monitoring experience. Measure your room first, then choose appropriately sized PreSonus studio monitors.
Neglecting Acoustic Treatment: Expensive PreSonus studio monitors in an untreated room sound muddy and unreliable. Budget 20–30% of your monitor cost toward acoustic panels and bass traps. Treatment dramatically improves what your PreSonus studio monitors can tell you.
Buying Monitors Before Your Room is Ready: If your studio space is currently unfinished or under construction, wait to purchase PreSonus studio monitors. Buying before you've optimised room placement and acoustics wastes their potential.
Matching Different Monitors for Stereo Monitoring: Always purchase identical stereo pairs. Mixing on different PreSonus studio monitors creates frequency balance problems that translate into poor mixes. If adding monitors later, match exactly.
Assuming Higher Price Equals Better Results: PreSonus offers excellent value across their range. A correctly selected mid-range pair outperforms an incorrectly sized premium pair. Consider your room and needs above all else.
Room Treatment Essentials
PreSonus studio monitors reveal your room's acoustic problems as clearly as they reveal your mixes. Low-frequency buildup in corners, first-reflection points, and parallel wall issues become obvious with good monitors. This is actually valuable information—it means you can treat the problems systematically. Budget allocation should be: 40% PreSonus studio monitors, 60% acoustic treatment and proper speaker stands. This produces better results than the opposite approach.
Monitoring Setup and Positioning
Proper placement transforms PreSonus studio monitor performance dramatically. Position monitors at ear height, forming an equilateral triangle with your listening position. Keep them away from walls and corners to minimise bass accumulation. Use proper speaker stands designed for your PreSonus studio monitor size and weight. Invest in quality stands and positioning—they're as important as the monitors themselves.
Making Your Decision
For additional information about PreSonus studio monitor technologies and features, read our comprehensive guide on PreSonus studio monitor speakers and technology. That resource covers technical details—this guide focuses on helping you make the right purchase for your situation.
PreSonus consistently delivers quality monitoring equipment at fair prices. By choosing the right monitor size, investing in acoustic treatment alongside your purchase, and positioning your PreSonus studio monitors correctly, you'll create a mixing environment that supports professional-quality work for years to come.



Comments