


Large Diaphragm Condenser Mic article
Large Diaphragm Condenser Mic for Beginners: A Complete Guide
Confused by large diaphragm condenser mics? This beginner's guide explains what they are, why they're perfect for home recording, key specs to understand, and how to pick your first.
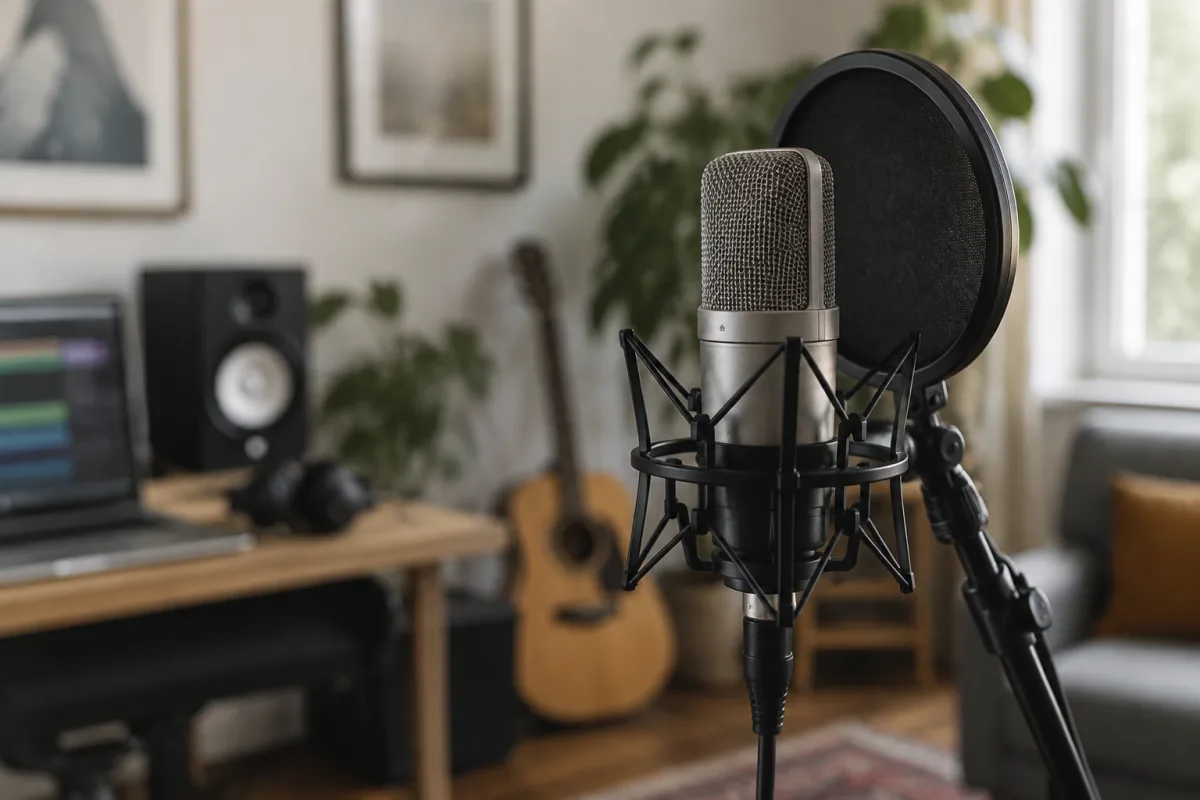
If you're building a home recording setup and stumbled across "large diaphragm condenser mic," it's tempting to nod knowingly and move on. Don't. Understanding what this microphone type does and when to use it is the difference between frustrated recordings and professional-sounding vocals. This guide strips away the jargon and shows you exactly what a large diaphragm condenser mic is, why beginners love them, and how to pick your first one.
What's a Large Diaphragm Condenser Mic?
Let's break the name apart. The "diaphragm" is the heart of any microphone—a thin membrane that vibrates when sound waves hit it. Larger diaphragms (typically 1 inch or more) capture sound differently than smaller ones, picking up more detail and richness. The "condenser" refers to how the microphone works: it uses a capacitor (an electronic component that stores charge) to convert vibrations into electrical signals. This design makes condenser mics sensitive and detailed, capturing subtleties other microphones miss.
In practical terms? A large diaphragm condenser mic is excellent at capturing the warmth and nuance of a voice or acoustic instrument. It's why they're studio standards for vocal recording, podcasting, and acoustic guitar.
Why Beginners Gravitate to Large Diaphragm Condensers
There are many microphone types out there. Beginners often choose large diaphragm condensers for good reason. They sound professional right out of the box—thick, warm, forgiving. The large diaphragm design captures vocal presence beautifully, which means your voice sounds like "you," just better. They're also affordable compared to rare ribbon or tube microphones, and they require minimal additional gear to use (just a microphone stand and cable).
For home recording, podcasting, or music production on a budget, a large diaphragm condenser is the workhorse choice. It's versatile enough to work on vocals, acoustic instruments, and room ambience, yet simple enough for beginners to operate.
How They Differ from Other Microphone Types
Condenser vs. Dynamic Mics: Dynamic microphones (like the Shure SM7B) use a magnet and coil design. They're rugged, need less power, and are excellent for live sound and loud sources. Condensers are more sensitive, capturing finer details, making them better for studio vocals and acoustic sources. Dynamic mics need less of a "treated" recording space; condensers are more sensitive to room noise and reflections.
Large vs. Small Diaphragm Condensers: Small diaphragm condensers (under 1 inch) are prized for recording acoustic instruments and room ambience because of their fast response and ability to capture transients (the initial attack of a sound). Large diaphragm condensers prioritize warmth and proximity effect (bass boost when you're very close to the mic), making them ideal for vocals. For beginners focused on recording voice, large diaphragm is the clear winner.
Condenser vs. Ribbon Mics: Ribbon microphones are beautiful but fragile, expensive, and require careful handling and lots of electrical power. Condensers are more beginner-friendly, tougher, and versatile.
Understanding Key Specifications
When shopping for a large diaphragm condenser mic, you'll encounter specs. Here's what actually matters for beginners:
Frequency Response (e.g., 20Hz–20kHz): This range tells you which pitches the microphone captures. The human ear hears roughly 20Hz to 20kHz, so a microphone with this range is complete. Anything close to it is fine. Don't obsess—most condensers cover the audible spectrum.
Sensitivity: Measured in dBV/Pa, this indicates how loud the microphone's output is for a given sound pressure level. Higher sensitivity means quieter sounds are captured more easily. For beginners, higher sensitivity is usually better—it means you get cleaner recordings from everyday speech and acoustic instruments without cranking your preamp to maximum gain.
Polar Pattern: This describes which directions the microphone picks up sound. Most large diaphragm condensers use a cardioid pattern, which captures sound primarily from the front and rejects sound from the rear. This is ideal for vocals and close-miking. Omnidirectional patterns (picking up from all directions) are less common and mostly useful for capturing room ambience.
Maximum SPL (Sound Pressure Level): This tells you the loudest sound the microphone can handle without distortion. For recording voices and acoustic instruments, most large diaphragm condensers have plenty of headroom (often 130dB+). Only worry about this if you're recording drums or very loud sources.
Phantom Power: What It Is and Why You Need It
Condenser microphones require power to operate. They don't run on batteries. Instead, they use "phantom power"—a small amount of electrical current sent through the microphone cable. Your audio interface, mixer, or preamp supplies this automatically when you flip the +48V switch.
For beginners, this means: buy a large diaphragm condenser mic, plug it into an audio interface with phantom power enabled, and it works. The "phantom" part is completely invisible. Don't be intimidated—just remember to turn phantom power on when you connect the mic, and off when you disconnect it (to protect the microphone).
Choosing Your First Large Diaphragm Condenser
The market is flooded with options. Here's how to narrow it down:
- Budget £150–£300: Entry-level options like the Audio-Technica AT2020 offer brilliant value. These don't have all the bells and whistles, but they sound professional and are remarkably reliable. Perfect for beginners finding their feet.
- Budget £300–£600: Mid-range microphones add refinement. Better specs, more durability, and sometimes switchable polar patterns or a pad (to handle loud sources). Neumann TLM102 and Rode Procaster sit here.
- Budget £600+: Professional-grade microphones with vintage-inspired designs or exceptional signal-to-noise ratios. These are "lifetime purchases" that reward upgrading your whole chain later.
As a beginner, start at £200–£300. You'll own a microphone that sounds fantastic and lets you focus on recording technique rather than gear. Upgrade later if you identify a genuine limitation.
Essential Accessories You'll Need
The microphone alone isn't enough. You'll need:
- Microphone stand or arm: Holds the mic at mouth level. Desktop arms are compact; boom stands are flexible. £20–£50.
- Pop filter: Reduces plosives (the "p" and "b" sounds that cause distortion). It's a simple mesh screen between your mouth and mic. £15–£40.
- XLR cable: Connects the microphone to your interface. £10–£30 for a decent one. Buy a good cable; cheap ones introduce noise.
- Microphone clip: Holds the mic in the stand. Most stands include one, but it's worth checking. £5–£15.
- Audio interface: Converts the mic's signal to digital audio your computer understands. This is a separate purchase but essential. £100–£300.
Setting Up Your Large Diaphragm Condenser
When your microphone arrives, follow this setup checklist:
- Attach the microphone to the stand and position it at mouth level, about 6–8 inches away.
- Place the pop filter between your mouth and the microphone.
- Run an XLR cable from the microphone to your audio interface.
- Enable phantom power on your interface.
- In your recording software, select the microphone as your input device.
- Set the input level so peaks don't exceed -6dB on your metres (leaving headroom for unexpected loud moments).
- Record a quick test. Listen back and adjust mic position if needed.
Common Beginner Mistakes to Avoid
Placing the microphone too close: The proximity effect (bass boost when very close) can make your voice sound boomy. Start 6–8 inches away and adjust from there.
Forgetting phantom power: If your mic isn't picking up sound, check that phantom power is enabled. It's the most common "broken microphone" problem.
Skipping the pop filter: Recording without one leaves your audio full of plosive distortion. A pop filter is cheap insurance for clean recordings.
Recording in an untreated room: Condenser mics pick up every echo and room noise. Start in a small, enclosed space (bedroom, closet) or use blankets to absorb reflections. As your skills develop, invest in acoustic treatment.
Buying a fancy microphone without testing it first: If possible, borrow a friend's condenser or rent one to try before buying. Your voice and tastes are unique; what works for others might not suit you.
Maintaining Your Microphone
Large diaphragm condensers are robust but deserve care. Store the microphone in its case when not in use. Keep it away from humidity extremes and direct sunlight. Clean the diaphragm (the grille) occasionally with a soft brush—never touch the capsule itself. If the microphone lives in a humid environment, consider a desiccant container to protect the electronics.
Taking the Next Steps
Once you've recorded with your large diaphragm condenser for a few weeks, you'll develop a feel for mic technique. Experiment with distance (closer sounds more intimate; farther captures more room). Try angling the mic slightly off-axis if harshness bothers you. These small adjustments teach you far more than specs ever could. Your ear becomes the best guide.
For a comprehensive exploration of large diaphragm condensers, their role in different recording scenarios, and advanced techniques, consult the complete guide to large diaphragm condenser mic.
Conclusion
A large diaphragm condenser microphone is the gateway to professional-sounding home recordings. It captures the warmth and nuance of your voice or acoustic instruments, it works beautifully with standard recording interfaces, and it doesn't require a PhD in audio engineering to use. Start with a trusted entry-level model, treat it with basic care, and focus on good mic technique and quiet recording spaces. Within weeks, you'll notice your recordings sound noticeably better. That's the power of choosing the right tool for the job.



Comments