


Thumb Piano article
Thumb Piano for Beginners: A Complete Guide
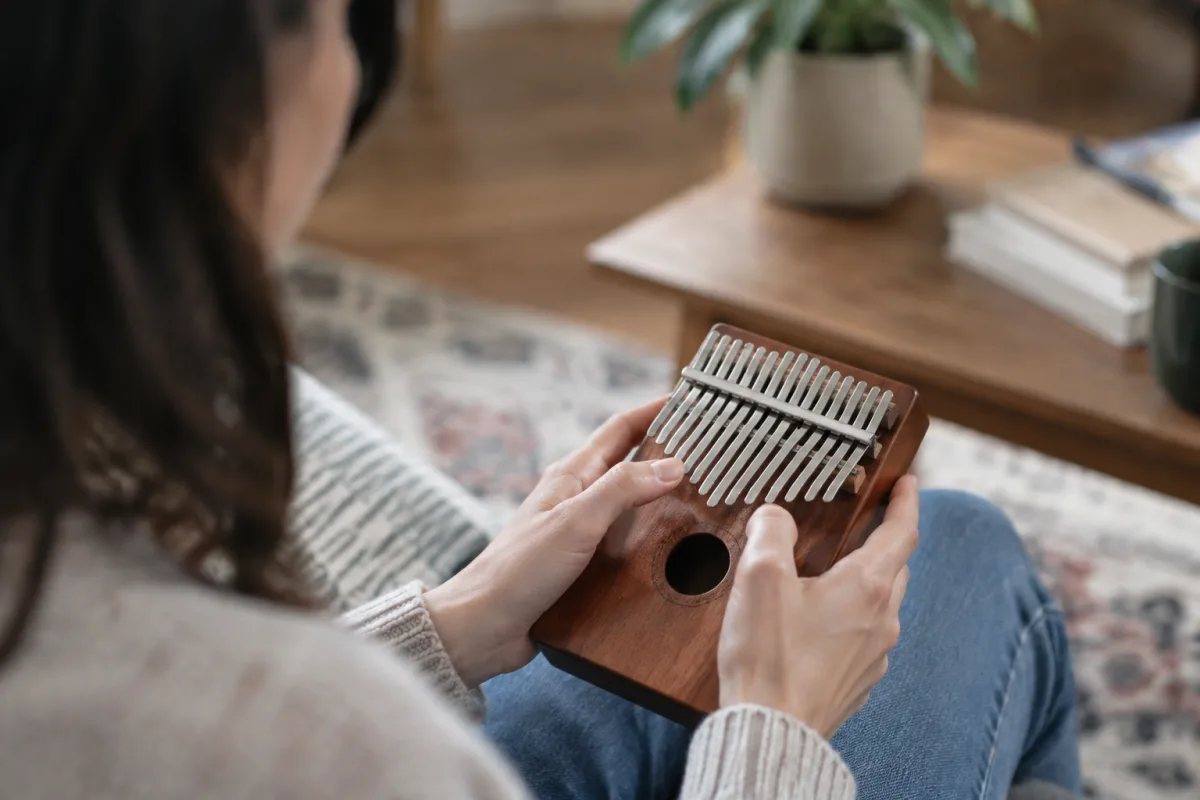
The thumb piano—also called a kalimba—is one of the most joyful instruments you can pick up. Within minutes of first playing one, you'll make recognisable music. Within hours, you'll be playing melodies that sound genuinely beautiful. Unlike many instruments that frustrate beginners for weeks, the thumb piano rewards you immediately. Yet despite this accessibility, many beginners struggle with a few common challenges: finger positioning, understanding the note layout, and building finger independence. This guide addresses exactly those issues, taking you from your first tentative plucks to confident, smooth melodies.
Understanding Your Thumb Piano
A thumb piano typically has 17 metal tines (keys) arranged in a specific pattern around a central wooden resonance box. The layout is logical once you understand it: the central tine (usually lower and longer) is your reference note. Working outward, the tines alternate between left and right, creating two scales—one on each side of the central spine. This symmetrical design is brilliantly simple. If you know where one note is, you can find its octave by moving outward symmetrically.
The metal tines create their distinctive warm, bell-like tone when you pluck them. This tone is part of the thumb piano's charm. Each note rings clearly and sustains naturally. The resonance box amplifies and colours the sound. More sophisticated thumb pianos have deeper resonance boxes and higher-quality tuning, but even inexpensive instruments sound lovely.
Holding and Positioning Your Thumb Piano
How you hold your thumb piano profoundly affects your playing comfort and skill development. Here's the proper technique:
Position the instrument: Rest the thumb piano on your lap or hold it steady against your chest. The wooden body should feel stable. Your hands should approach from the sides, not from above.
Thumb positioning: Your thumbs are your primary plucking fingers. Keep your thumbs relaxed and slightly curved. Pluck the metal tines by curling your thumb upward, using the fleshy underside of your thumb or the edge of your thumbnail. Don't use the flat of your thumb.
Finger position: Keep your hands relaxed with fingers slightly spread. Your index and middle fingers can assist with faster passages, but beginners should focus on developing thumbs-only technique first. This builds muscle memory and clarity.
Common mistake: Don't grip the instrument with tension. Tension in your hands travels through your arms and shoulders, causing fatigue and limiting speed and fluidity. Stay relaxed. The thumb piano should feel like an extension of your hands, not something you're wrestling with.
Your First Steps: Learning the Note Layout
The thumb piano has a consistent pattern once you understand it. The central tine (often marked) is your home note. Let's call it C. Working outward from the centre:
- Left side (from centre outward): Each tine you move outward is a step higher in the musical scale.
- Right side (from centre outward): The same pattern repeats in mirror image.
- Outer edges: Moving to the very outside tines on either side lowers the pitch significantly.
Spend your first practice session just exploring this pattern. Play the central tine repeatedly, then pluck one step to the left. Then one step right. Walk your way through the scale on each side. Your hands will quickly develop a spatial sense of where each note lives. This is foundational.
Playing Your First Melody
Once you've explored the layout, you're ready for an actual melody. Many thumb pianos come with sheets showing simple tunes. "Mary Had a Little Lamb" is perfect for beginners. It uses just a few notes and teaches basic rhythmic timing.
Approach: Play each note slowly and deliberately. Don't worry about speed yet. Focus on plucking each note clearly without buzzing or muting the tone. Your goal is clarity and confidence, not speed.
Rhythm: Keep a steady beat. Count out loud if needed: "one, two, three, four." This trains your internal timing and helps you understand the structure of melodies.
Common beginner issue: You'll sometimes pluck a note and hear a dull thud instead of a clear ring. This usually means you didn't release the tine fully. Pluck upward and release immediately. Let the tine vibrate freely. This takes practice, but your technique will improve quickly.
Building Finger Independence and Speed
As you become comfortable with basic melodies, you'll want to play faster and smoother. This requires developing finger independence—the ability to use both hands and multiple fingers without them interfering with each other.
Alternating thumbs: Practice simple patterns using left thumb, then right thumb, back and forth. This trains coordination and allows faster passages.
Using your fingers: Once thumb technique is solid, add your index and middle fingers. These allow very fast passages but should be introduced gradually.
Tremolo: Try rapidly plucking the same tine with alternating thumbs. This creates a tremolo effect that's beautiful and trains hand synchronisation.
Common Beginner Challenges and Solutions
Buzzing or dull notes: You're not releasing the tine fully. Pluck from below and release immediately. The tine should vibrate freely without hitting the thumb or other tines.
Inconsistent volume between left and right hands: This is normal initially. Your hands are developing different strengths. Consistent practice makes both hands equal within weeks.
Notes sounding out of tune: Most thumb pianos hold their tuning well, but check that no tines are bent or damaged. If the entire instrument sounds flat, you may need professional re-tuning after months of play.
Difficulty finding specific notes: You're not alone. This improves naturally as you play more. Create a note map (write down which tine is which note) and reference it until the layout is in your muscle memory.
Frustration with slow progress: Remember, you can play recognisable melodies within hours of starting. This is phenomenally fast compared to other instruments. Progress feels slow only if you compare yourself to where you think you "should" be. Enjoy the journey.
Building Your Repertoire
Start with simple folk melodies and nursery rhymes: "Twinkle Twinkle Little Star," "Happy Birthday," "Greensleeves." These teach rhythm and melody without requiring complex finger work. As your confidence grows, look for thumb piano tabs online—many musicians share arrangements specific to kalimba tuning.
Play along with recordings of these melodies. This trains your ear and makes practice more enjoyable than practising in silence.
For comprehensive information about thumb pianos, their history, and different types, read the complete guide to thumb piano.
Your Journey with the Thumb Piano
The thumb piano is genuinely unique among musical instruments. You'll make beautiful music almost immediately, yet you'll never run out of challenges as you progress. There's an elegance to the symmetrical design and the simplicity of the plucking technique that lets you focus on musicality rather than overcoming technical barriers.
Your first practice sessions should be joyful. You're holding an instrument that's been played for thousands of years. You're creating music that's beautiful to your own ears and to anyone listening. Keep your expectations reasonable—focus on clarity and relaxation rather than speed or perfection. Play regularly, listen to yourself carefully, and watch as your skills grow almost imperceptibly from day to day.
Within weeks, you'll be playing melodies that truly satisfy you. Within months, you'll understand why the thumb piano has inspired musicians and audiences alike. Welcome to the world of thumb piano playing.


Comments