


16 Channel Mixer article
16 Channel Mixer for Beginners: A Complete Guide
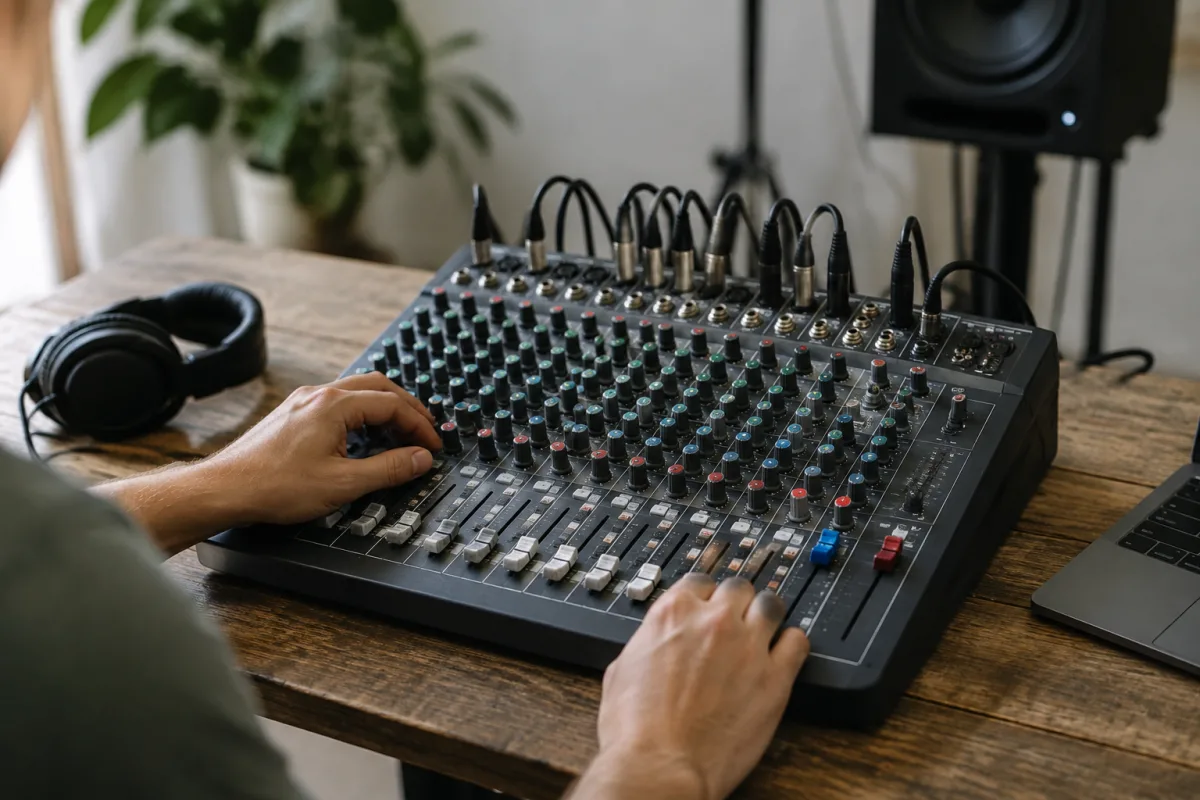
A 16 channel mixer can feel intimidating when you're first starting in live sound or small-venue audio management. The array of knobs, faders, and buttons seems overwhelming at first glance. However, a 16 channel mixer is fundamentally approachable once you understand its basic workflow. Whether you're mixing a band's live performance, managing audio at a small venue, or running sound for events, a 16 channel mixer offers genuine practical value without requiring years of experience to use effectively. This guide walks you through understanding and operating a 16 channel mixer, demystifying the controls and building your confidence for real-world sound mixing.
Why a 16 Channel Mixer for Your Application
Before diving into technical details, understand when a 16 channel mixer makes sense. A small group performing with drums, bass, keyboards, and three vocals needs roughly 8-12 channels. A band with additional instruments or multiple microphones on drums benefits from 16 channels. Even if you don't need all 16 today, a 16 channel mixer grows with your requirements. For beginners, starting with a 16 channel mixer is sensible because it's neither underpowered nor overwhelming—it's the working professional's standard tool, proving you're taking your audio seriously.
For a comprehensive look at 16 channel mixers and how they compare to other options, review our complete guide to 16 channel mixers.
Understanding Your 16 Channel Mixer's Layout
A 16 channel mixer contains repeated sections that look complex but follow predictable patterns. Spend time visually mapping your 16 channel mixer before powering it on:
| Section of 16 Channel Mixer | Purpose and Beginner Focus |
|---|---|
| Channel Input Strip (repeated 16 times) | Each channel handles one input. Every channel on your 16 channel mixer contains a fader, pan knob, and EQ controls. Learn one channel, and you understand all 16. |
| Gain Control (top of each channel) | This is your 16 channel mixer's first line of defense. Proper gain setting ensures clean, loud signal throughout the mixer. |
| EQ Section (mid-section of channels) | Most 16 channel mixers offer three-band EQ per channel. These allow basic tonal shaping—brighten vocals, warm bass. |
| Fader (bottom of each channel) | This is what you'll touch most on your 16 channel mixer. Faders set relative levels between channels. |
| Master Fader (end of 16 channel mixer) | Controls overall output level of your entire 16 channel mixer. Keep this conservative—never max out. |
| Metering Section (displays on your 16 channel mixer) | Your 16 channel mixer's meters show signal levels. These are visual guides, not decorative—check them constantly. |
Setting Up Your 16 Channel Mixer: Step-by-Step
Proper setup prevents 90% of beginner problems with a 16 channel mixer:
- Connect your 16 channel mixer to speakers. Plug main outputs into powered speakers or an amplifier. Test audio output before loading the band.
- Connect microphones and instruments to channels. Use the input connectors on your 16 channel mixer. Label which instrument uses which channel—tape works perfectly.
- Turn on your 16 channel mixer and let it warm up. Analog gear needs a few moments; digital mixers need software to load. Wait 30 seconds before proceeding.
- Set all channel faders to unity (marked line, usually around the middle). This is your baseline on your 16 channel mixer. You'll adjust from here.
- Set your 16 channel mixer's master fader to a moderate level. Around -6dB to -3dB is safe. You'll raise this gradually during sound check.
- Test each input individually on your 16 channel mixer. Play/speak into each connected source. Confirm all channels register sound on your 16 channel mixer's meters.
Balancing a Mix with Your 16 Channel Mixer
Once setup is complete, actual mixing on your 16 channel mixer follows this workflow:
- Start with all channels at unity on your 16 channel mixer. Get a sense of balance before aggressive adjustments.
- Pull faders down on your 16 channel mixer to create relative levels. Lower the drums slightly, boost the vocals. Find balance through fader adjustment.
- Use EQ on your 16 channel mixer subtly. A slight high-end boost on vocals or low-end reduction on muddy instruments makes dramatic improvements without looking extreme.
- Check your 16 channel mixer's master level constantly. If the master is climbing toward max, your input levels are too hot. Lower inputs slightly on your 16 channel mixer and try again.
- Walk the room listening on your 16 channel mixer mix. How does it sound 5 metres away? In the back? Different perspectives reveal balance problems your 16 channel mixer's proximity masks.
Critical Controls on Your 16 Channel Mixer to Master First
You don't need every control on your 16 channel mixer day one. Start with these essentials:
- Gain on your 16 channel mixer sets input level. Proper gain keeps signal strong and clean. Too high causes distortion; too low sounds weak.
- High and Low EQ on your 16 channel mixer brighten or darken channels. These two controls handle 80% of tonal shaping needs.
- Faders on your 16 channel mixer set relative levels. Master fader movement is your primary tool for controlling overall volume.
- Pan on your 16 channel mixer places signals left-right in stereo. Keep most channels centred initially; panning comes later with experience.
Common Beginner Mistakes with a 16 Channel Mixer
Most beginners stumble over predictable pitfalls with a 16 channel mixer:
- Setting gain too hot on your 16 channel mixer. Overdriven input distorts no matter how you adjust faders. Keep gain conservative.
- Not reading your 16 channel mixer's meters. Meters show level reality your ears can miss. Check them constantly during mixing.
- Adjusting only the master fader on your 16 channel mixer. Professional mixing comes from individual channel fader management, then small master adjustments.
- Cranking EQ on your 16 channel mixer aggressively. Subtle EQ sounds better. If you've boosted something 6dB+, you're overdoing it.
- Forgetting to label channels on your 16 channel mixer. Mid-performance, knowing which fader is drums versus bass matters enormously. Label everything.
- Taking maximum master fader as your target on your 16 channel mixer. Hitting maximum volume isn't the goal. Proper balance at moderate volume is.
Building Experience with Your 16 Channel Mixer
After five live sound events mixing with a 16 channel mixer, you'll develop instinct for how channels interact. After twenty events, you'll spot balance problems instantly and know which adjustments fix them. This skill growth is normal and expected. Every professional mixing live sound started exactly where you are—slightly nervous, armed with a 16 channel mixer, and determined to learn.
Moving Forward Confidently
A 16 channel mixer is a legitimate professional tool. You're not learning a toy; you're developing skills used by live sound engineers worldwide. Your initial nervousness is completely normal; it passes within weeks of hands-on use. Take time during sound checks to experiment with your 16 channel mixer. Ask bands for feedback. Read your 16 channel mixer's manual selectively, learning sections relevant to your actual use. Within months, your 16 channel mixer will feel like a natural extension of your creativity. Good luck with your first live sound mixes.



Comments