


Hercules Mic Stands article
Hercules Mic Stands for Beginners: A Complete Guide
Getting started with a Hercules mic stand is simpler than you might expect, and using one properly transforms your recording experience immediately. This guide walks you through everything from initial setup.
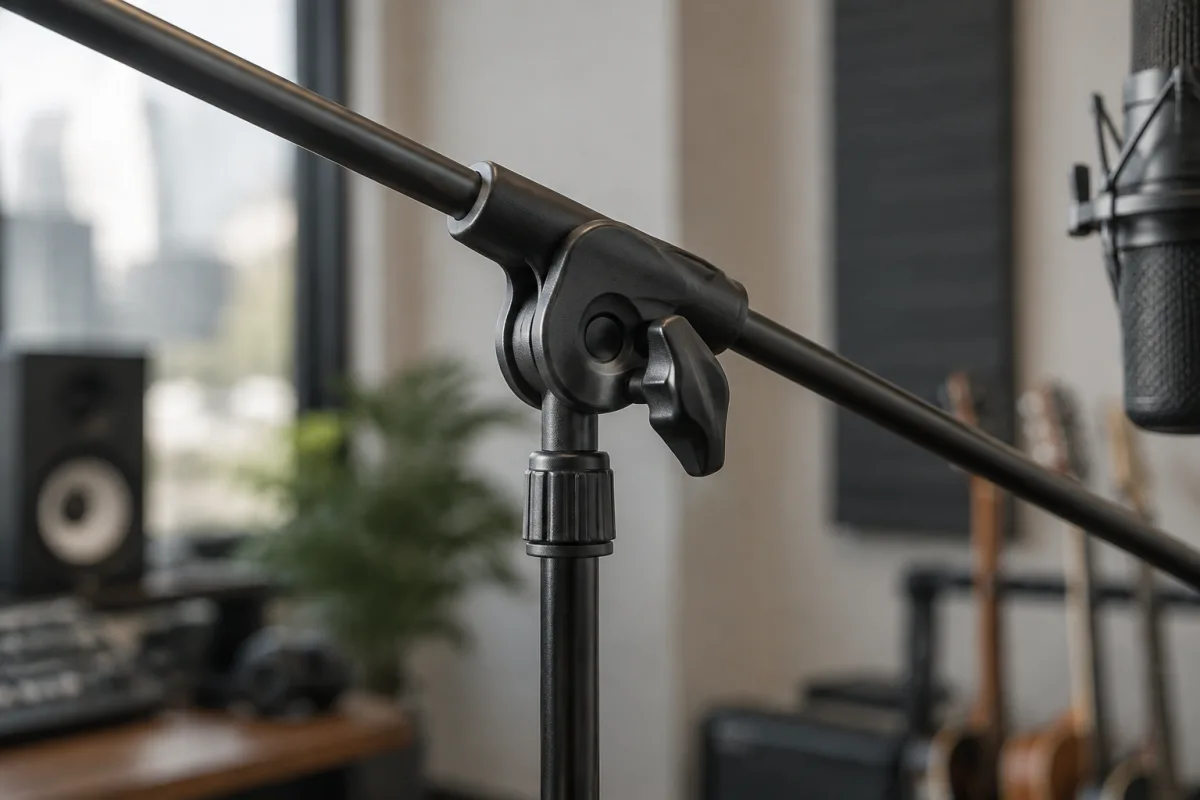
Getting started with a Hercules mic stand is simpler than you might expect, and using one properly transforms your recording experience immediately. A quality microphone stand positions your microphone exactly where you need it, freeing your hands for performance or technical adjustments. Hercules stands are renowned for reliability and ease of use—perfect for beginners who want professional results without complexity. This guide walks you through everything from initial setup through confident daily use.
What a Mic Stand Does and Why You Need One
A microphone stand holds your mic at optimal recording height and distance, maintaining consistency across multiple takes. Without a stand, you're holding the microphone manually—an exhausting and unreliable approach that changes microphone position with every take and causes hand fatigue. A proper stand eliminates these problems, letting you concentrate on performance or speaking naturally whilst recording.
Hercules stands specifically offer rock-solid stability that prevents vibration transmission from the floor or desk to your microphone. Professional recordings demand this stability; vibration pickups destroy audio clarity. Hercules achieved their reputation by solving this fundamental problem better than competitors.
Choosing the Right Hercules Stand for Your Setup
Hercules manufactures several mic stand types for different situations. Boom stands (with extended arm) suit desk-mounted recording where your microphone floats over your workspace. Straight stands (vertical pole with no extension) work when your microphone mounts directly above, like behind a piano. Tabletop stands (compact, short tripod base) fit tiny workspaces or travel situations.
For home recording on a desk, a boom stand is your best starting point. It keeps the microphone out of your lap, prevents cable clutter, and allows height adjustment without moving your entire setup. Budget £30–£60 for a quality Hercules boom stand—this single purchase improves recording comfort and consistency dramatically.
Unpacking and Initial Setup
Your Hercules stand arrives in a compact box. Unpack carefully, checking that all components are present: the base (weighted tripod), the boom arm, the clutch mechanism (tightening knob), the microphone clip, and any accessories. Keep the box and packaging—you'll appreciate them if you ever need to transport or store the stand.
Assembly is genuinely simple. Screw the boom arm into the base. Attach the microphone clip to the boom. That's complete assembly. Hercules designs these stands for minimum fuss—no complex tooling or confusing parts. You'll have it ready for your microphone within minutes.
Mounting Your Microphone Securely
Your Hercules clip accommodates microphones of various diameters through an adjustable mechanism. Inspect the clip and locate the tightening knob. Loosen it fully, then position your microphone inside. For condenser microphones (the typical starter choice), orient the microphone vertically in the clip. Tighten the knob firmly—the microphone shouldn't shift or wobble when nudged.
The key mistake beginners make is under-tightening the clip, resulting in microphones that drift or rotate during recording. Tighten confidently but not so hard you risk damaging the microphone body. The grip should feel absolutely solid. If your microphone wobbles, tighten the clip more.
Positioning Your Microphone Correctly
Height matters significantly for recording quality. Position your microphone at mouth level when sitting comfortably. Speaking or singing directly into a microphone at mouth height naturally produces excellent tone. Positions too high or low sound unnatural and often pick up unwanted desk noise or mouth clicks.
Distance also affects tone. Speaking from 15-20cm away (about 6-8 inches) produces natural, professional-sounding vocal recordings. Closer distances exaggerate proximity effect—an unnatural bass boost—and increase mouth noise and plosives. Farther distances sound distant and thin. Find your comfortable distance (usually 15-20cm) and use your stand's boom arm to maintain it consistently.
Angle your microphone slightly downward, not pointing straight at your mouth. This positioning reduces harsh breath sounds and plosives that directly impacting the microphone cause. Many professional setup photos show microphones angled slightly down—this is intentional, not accidental.
Adjusting Height and Angle: The Clutch Mechanism
Your Hercules stand features a clutch knob that controls boom arm tightness. Loosen it slightly and the boom arm moves smoothly; tighten it fully and the boom locks in place. Here's the counterintuitive part: you want the clutch tight enough that the boom doesn't drift under the microphone's weight, but loose enough you can adjust position with reasonable hand pressure.
The tightening sweet spot takes 30 seconds to learn. Position your microphone, then gradually tighten the clutch until the boom no longer drifts downward. Test this by releasing the boom arm—it should stay put. If it's too loose, tighten more. If it resists movement, loosen slightly. Within a minute, you'll develop feel for perfect clutch tension.
Preventing Vibration and Noise
Hercules stands excel at isolating vibration, but technique matters too. Ensure the stand base sits on a firm surface. If your desk is wobbly, the stand will transfer that wobble to your microphone. Place the stand on the most solid part of your desk. If recording on a creaky floor, position the stand away from foot traffic.
Keep your keyboard and mouse away from the stand base—typing or mouse clicking sends vibration through the desk that the microphone can pick up. If space is tight, consider your workflow. Can you pause recording during periods when you'll use keyboard/mouse? Can you position the keyboard away from the stand? Small positioning adjustments prevent vibration problems.
Common Beginner Mistakes to Avoid
Don't skip the clutch adjustment. A properly adjusted clutch prevents microphone drift during recording. Loose clutches cause the boom to sag mid-sentence, moving the microphone away from your mouth—a painful recording to listen to. Spend 30 seconds getting clutch tension right, then stop worrying about it.
Avoid positioning the microphone too close. Beginners often assume closer is better, but 15-20cm produces more professional results than 5cm. Experiment with distance during a test recording, then maintain that distance consistently.
Don't overtighten the microphone clip. A firm grip is correct; crushing the clip risks damaging your microphone. Tighten enough that the microphone doesn't shift, then stop.
Resist mounting the stand on surfaces directly connected to vibration sources. Stands on desks with mechanical equipment rumble irritatingly. Stands on wooden floors pick up footstep vibration. Choose solid, isolated surfaces whenever possible.
Maintenance and Long-Term Care
Hercules stands require minimal maintenance. Occasionally check that all screws remain tight—vibration can loosen fasteners slightly over months of use. If you notice any rattle or loose feel, locate the offending screw and tighten. A quick once-per-month inspection prevents problems.
Keep your stand clean and dust-free. A microfiber cloth occasionally wiped over the boom and base maintains appearance and prevents dust accumulation. Avoid solvents or harsh cleaners—simple dusting suffices. Store your stand in a dry location; rust is rare but preventable through basic care.
Troubleshooting Common Issues
Microphone drifts during recording? Your clutch is too loose. Tighten the clutch knob a quarter-turn and test again. Repeat until the boom stays completely stable.
Base feels unstable or wobbles? Check that the boom isn't extended too far—extreme extension stresses the base. Shorten the boom slightly and reposition. Check that you're not leaning on the stand or bumping it during recording.
Microphone won't grip securely? Your clip may be partially loosened accidentally. Inspect and re-tighten the clip holding mechanism firmly.
Boom won't move smoothly? Loosen the clutch more—you may have over-tightened. Test movement and adjust until smooth adjustment is possible.
Expanding Your Setup
Once comfortable with your Hercules stand, you might explore accessories like a shock mount (isolates microphone from stand vibration), pop filter (reduces harsh breath sounds), or additional boom arms. These are optional enhancements—your basic stand produces professional results without them. Add accessories only as you identify genuine needs.
For comprehensive information about Hercules microphone stands and their capabilities, review our complete guide to Hercules mic stands.
Building Confidence in Your Mic Stand Setup
After your first few recordings, you'll notice how a proper stand improves consistency and comfort. Your microphone position remains stable across takes. Your hands are free for notes or adjustments. Your recordings sound professional because the microphone position doesn't vary mid-sentence. These improvements compound—quality recordings encourage more recording, which develops skills and confidence.
You're not as far from professional results as you feel. A Hercules stand is a genuine investment in recording quality. Use it properly, maintain it simply, and it becomes an invisible tool that just works. That's exactly what professional equipment does.



Comments