


Presonus Audio Interface article
Presonus Audio Interface for Beginners: A Complete Guide
PreSonus audio interfaces transform your computer into a recording studio at beginner-friendly prices. Our guide covers setup, first steps and demystifies recording technology.
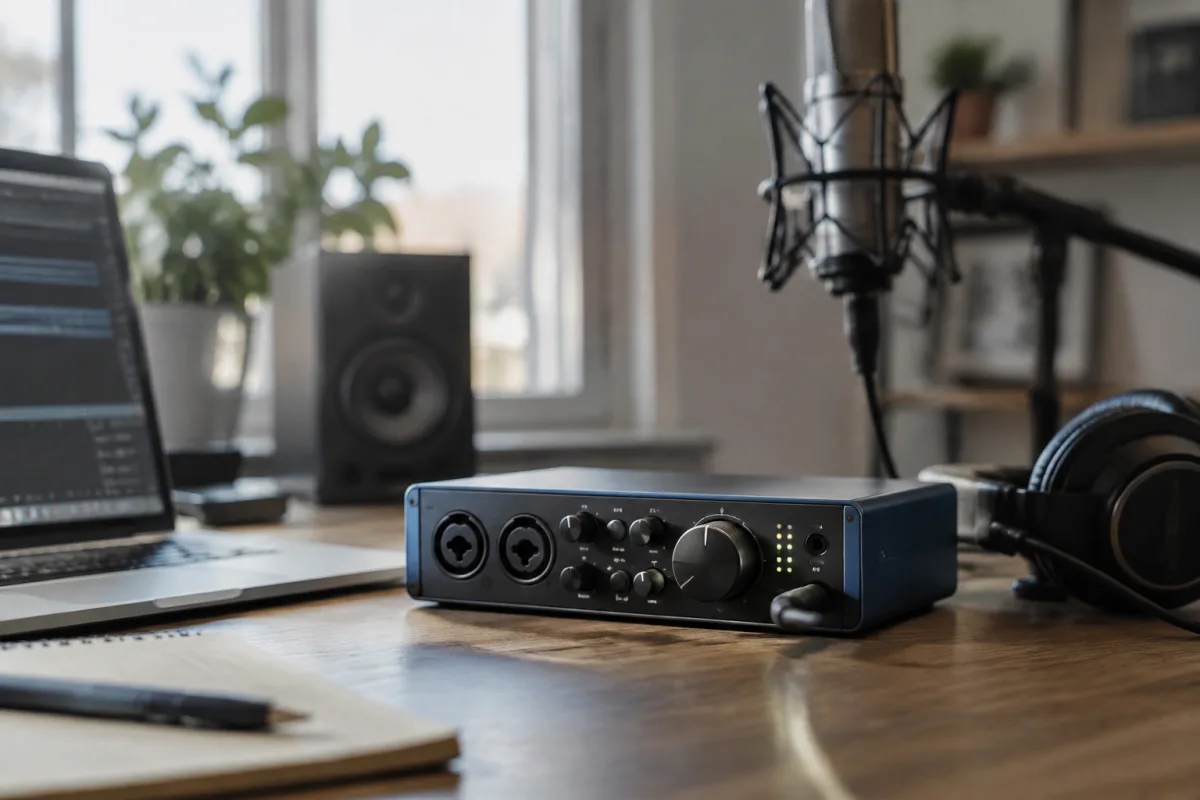
If you're exploring home recording for the first time, a PreSonus audio interface might seem intimidatingly technical. Actually, audio interfaces are straightforward devices that transform your computer into a capable recording studio. PreSonus manufactures some of the most beginner-friendly, affordable interfaces available, making them ideal entry points for anyone serious about recording music. This guide demystifies audio interfaces, explains what PreSonus offers at beginner price points and walks you through setup and first steps without overwhelming technical jargon.
What Is an Audio Interface and Why Do You Need One?
Your computer has built-in audio capabilities—a microphone input and speaker output. However, that microphone input has minimal quality, poor impedance matching and insufficient gain (volume amplification) for professional recording. An audio interface sits between your instruments, microphones and computer, converting analogue signals into digital data your computer understands and back again with quality and reliability far exceeding your computer's built-in hardware.
Think of an audio interface as the foundation of your recording studio. Everything else—microphone, headphones, software—depends on the audio interface to work properly. PreSonus interfaces are designed specifically with beginners in mind: simple to set up, easy to operate and affordable without sacrificing core functionality.
Understanding Basic Audio Interface Specifications
Audio interfaces have several key specifications that matter for recording. Audio resolution is typically 16-bit or 24-bit—higher bit depth captures finer detail. Sample rate is typically 44.1 kHz, 48 kHz or 96 kHz—higher rates capture more frequency detail. For beginners, 24-bit at 44.1 or 48 kHz is more than adequate and is the industry standard for music production.
Inputs and outputs refer to how many devices you can connect simultaneously. A basic interface might have two inputs (one microphone, one instrument) and two outputs (stereo headphone monitoring). More complex interfaces offer eight, sixteen or more inputs and outputs. For bedroom recording, two inputs and stereo outputs are usually sufficient.
Latency is the delay between playing an instrument and hearing it through headphones. Low latency (under 5ms) feels responsive; high latency (over 20ms) feels sluggish and discourages comfortable playing. PreSonus interfaces are designed for low latency, essential for overdubbing and monitoring.
Don't worry about memorising these specs. The key insight: PreSonus beginner interfaces handle standard music production excellently. You don't need to understand every specification—just ensure your interface has enough inputs for your recording needs and low latency for monitoring.
PreSonus Beginner Interface Models
PreSonus offers several beginner-friendly interfaces at accessible prices. The StudioLive AR series combines a mixing console with audio interface functionality—excellent for bedroom recording and live performance, typically £200–£600. The Quantum series provides professional-level features at premium pricing (£800–£1,500+), suited to serious home studios. For absolute beginners, the AudioBox and StudioLive AR2 series (£100–£300) offer excellent value and simplicity.
For most bedroom recording beginners, PreSonus interfaces in the £150–£300 range hit the sweet spot. They offer adequate inputs, reliable operation and included software bundles that get you recording quickly without additional purchases. Don't overspend on professional-grade interfaces when learning; a quality beginner model serves your needs perfectly.
Inputs, Outputs and Connection Types
PreSonus interfaces typically connect to your computer via USB. This single cable provides both audio connectivity and power to the interface—remarkably convenient and reliable. Ensure your computer has an available USB port; modern computers have plenty, but older machines might require a USB hub.
Inputs vary by model. Beginner models typically feature one XLR microphone input (for microphones) and one quarter-inch instrument input (for guitars, basses and keyboards). More expensive models add additional XLR inputs for multiple microphones. For recording a single source (vocal or guitar), one XLR and one instrument input are perfectly adequate.
Outputs typically include stereo headphone output (crucial for monitoring whilst recording) and stereo line output (usually quarter-inch or XLR connectors for connecting studio monitors). Some models add MIDI input and output for controlling synthesisers or other MIDI devices.
Installation and First Steps: It's Simpler Than You Think
Installing a PreSonus audio interface is straightforward. Connect it to your computer via USB. Download and install the driver software from PreSonus's website—this is the only complex step, but PreSonus provides clear instructions. Restart your computer. Open your recording software and select the PreSonus interface as your input and output device. That's it—you're recording-ready.
PreSonus interfaces ship with software bundles—often Notion (sheet music notation), Studio One (professional DAW) lite versions or sample packs. These bundles add significant value, giving you everything needed to start recording without additional purchases.
Your first recording is simple: connect a microphone or instrument to the interface, launch your recording software, hit record and play. Hearing your performance captured digitally for the first time is genuinely exciting and often surprises beginners with how good even simple setup sounds compared to using laptop microphone.
Monitoring and Headphone Setup
Monitoring—hearing yourself play through headphones whilst recording—is crucial for quality recordings. Without monitoring, you're flying blind, unable to hear if the gain (volume) is set correctly or if something's wrong with the connection. Cheap headphones work for monitoring; high-quality studio headphones are better but not essential initially.
Connect your headphones to the interface's headphone output, not directly to your computer. This routes your recorded signal through the interface, giving you the direct, low-latency monitoring that makes overdubbing feel natural. High latency monitoring (hearing yourself with delay) is maddening and discourages comfortable playing.
Set your monitoring level using the interface's headphone knob (not your software's volume control). This level should be loud enough to hear clearly but not uncomfortable. You'll develop a feel for proper level within your first recording session.
Understanding Gain and Recording Levels
Gain is the volume amplification your interface applies to incoming signals. If your microphone or instrument is too quiet, increase gain. If it's too loud and distorting, reduce gain. Every audio interface has a gain knob for each input—PreSonus interfaces make this prominently visible on the front panel with clear labels.
Proper gain setting is crucial for recording quality. If gain is too low, your recording will be quiet and require aggressive amplification later, introducing noise. If gain is too high, your signal will distort and sound terrible no matter how you correct it later. Aim for recording levels that register on your software's meter around -12 to -6 dB, leaving headroom to prevent distortion.
Most beginner mistakes involve improper gain setting. Spend five minutes learning to set gain correctly, and you've eliminated the single biggest cause of poor-quality beginner recordings.
Software and DAW Selection
Your audio interface is just hardware. Recording software (called a DAW—Digital Audio Workstation) runs on your computer and receives audio from the interface. PreSonus includes free or discounted software with most interfaces, which means you don't need to buy anything additional to start recording.
Studio One Artist (PreSonus's included DAW) is genuinely capable for beginner and intermediate recording. Other popular free or affordable alternatives include Reaper, GarageBand (Mac only) and Audacity (basic recording). For absolute beginners, PreSonus's included software eliminates the burden of choosing and purchasing a DAW separately.
Common Beginner Mistakes to Avoid
The biggest mistake beginners make is setting gain incorrectly, resulting in quiet, noisy recordings or distorted ones. Spend five minutes understanding how to set proper recording levels, and you've solved this immediately.
Another common mistake is purchasing expensive professional interfaces before understanding basic recording fundamentals. A £150 PreSonus interface teaches you everything you need about recording; a £1,000 professional interface adds capabilities you won't use. Buy beginner-appropriate equipment, learn thoroughly, then upgrade when your needs exceed what beginner gear offers.
Some beginners also neglect monitoring setup, attempting to record without hearing themselves through headphones. This makes overdubbing impossible and creates frustration. Proper monitoring headphone connection transforms the recording experience from confusing to intuitive.
Finally, many beginners get discouraged by their first recordings sounding worse than they expected. This is universal and completely normal. Every recording engineer started with mediocre recordings. Quality improves through practice, learning and experience. Don't judge your recordings harshly initially; instead, focus on understanding why they sound the way they do and improving systematically.
Growing Your Setup
Your PreSonus audio interface is the foundation of your recording setup. As you develop, you'll eventually add a quality microphone, studio monitors (powered speakers), proper microphone stand and acoustic treatment. But these purchases are premature for beginners; a decent microphone and your interface are sufficient to start recording quality music.
Interestingly, many musicians discover their £150 PreSonus interface is genuinely adequate for their needs. Professional recordings have been made on beginner-grade interfaces. Technique, microphone placement and DAW skill matter far more than equipment sophistication.
Conclusion
A PreSonus audio interface transforms your computer into a capable recording studio at minimal cost. The hardware is simple, straightforward and beginner-friendly. Installation is quick, and included software eliminates additional expense. Within an hour of setup and practice, you'll be recording music with professional quality that would have seemed impossible in your computer's built-in recording capabilities. Don't be intimidated by technical terminology; an audio interface is simply a quality converter between analogue instruments and digital recording. Start with a PreSonus beginner interface, learn recording fundamentals through practice, and gradually develop expertise. Your first recording might be humble, but it represents the beginning of genuine music production capability. That's genuinely exciting and worth celebrating as you begin this creative journey.



Comments