


Kick Drum Microphone article
Kick Drum Microphone for Beginners: A Complete Guide
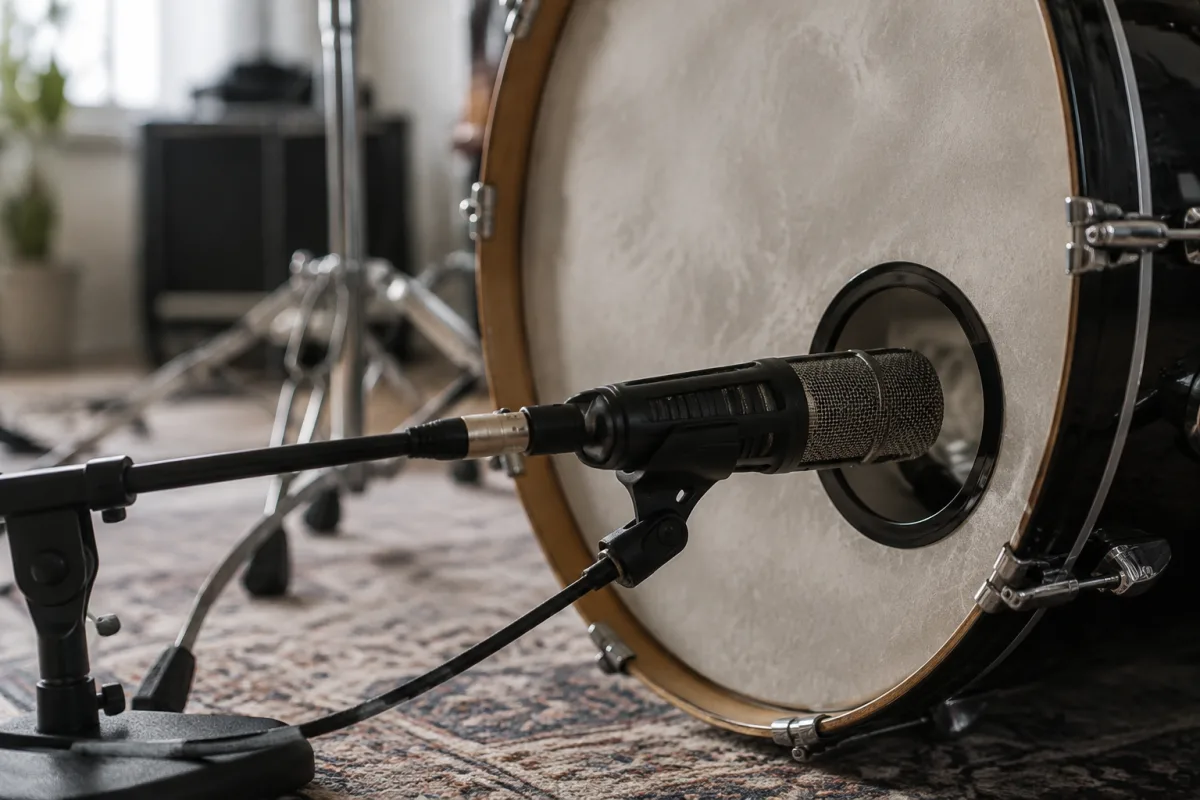
Recording a kick drum properly seems like it should be simple: put a microphone near the kick, press record, done. In reality, kick drum recording is surprisingly nuanced. Get it wrong and your recording sounds thin, boomy, or lacks definition. Get it right and your kick has weight, attack, and presence that sits perfectly in a mix. If you're recording drums for the first time, the kick drum is where you should focus your attention. It's the foundation of your rhythm section. A great-sounding kick makes everything else easier to record and mix. This beginner's guide takes you through microphone selection, placement techniques, and the common mistakes that ruin kick drum recordings.
Understanding Kick Drum Microphone Fundamentals
The kick drum produces low-frequency energy (the boom) and higher-frequency attack (the beater hitting the head). Capturing both requires understanding your microphone and placement. The challenge for beginners is that most microphones are designed to reject very low frequencies, making capturing pure kick drum low end difficult. Yet the best kick drum recordings blend deep lows with punchy attack.
Here's the good news: you don't need specialized equipment to record a good kick drum. A dynamic microphone (like a Shure SM57) and a bit of knowledge about placement will get you professional results. Let's start there.
Choosing the Right Microphone for Kick Drums
Dynamic microphones: These are the standard choice for kick drums. Shure SM57, Shure Beta 52A, and Audix D6 are classics used in studios worldwide. Dynamic mics handle high sound pressure levels well and naturally reject room noise. They're affordable and reliable. If you're buying one microphone to record kick drums, buy a dynamic.
Condenser microphones: These capture more detail and are excellent for capturing the beater attack. However, they're more sensitive to loud impacts and room noise. Most beginners should avoid condensers for kick drums.
Kick drum-specific microphones: Specialised kick drum mics (like the Audix D6 or Shure Beta 52A) are voiced specifically for drum recording. They naturally emphasise the frequencies that make kicks sound punchy. These are worth considering if you're serious about drum recording.
Microphone Placement Techniques
Inside the kick drum: This is the classic placement. Place your microphone inside the drum, either through a hole cut in the shell or pointing through the hole where the beater strikes. Position it about 4-8 inches from the beater head, pointing toward where the beater hits.
This placement captures maximum beater attack and deep low end. The kick drum becomes a resonance chamber amplifying the mic's signal. This is the placement professionals use most often.
Outside the kick drum: Position the microphone 12-24 inches away from the beater hole, pointing straight at it. This captures a blended tone combining attack and resonance without the extreme lows of internal placement.
This placement is useful if internal placement isn't practical or if you want a more natural sound with less extreme low end.
Dual microphone technique: Use one microphone inside for the beater attack and one outside for the resonant body. Mix both in your recording to get attack and depth. This is advanced but sounds incredible once you understand how to blend them.
Your First Kick Drum Recording Session
1. Position your microphone: If this is your first time, use the inside placement. Place your mic about 6 inches inside the kick, pointing toward the beater head. Leave enough space that the beater doesn't hit the microphone (disaster!). Point the mic slightly upward from the beater's strike point.
2. Set your input level: This is crucial. Kick drums produce high sound pressure levels. Set your input level so the kick's loudest hit peaks around -6dB to -3dB on your recording device's meter. Never let it hit red (clipping distortion).
3. Do a test recording: Record the drummer playing the kick drum at performance intensity. Play it back and listen for:
- Clean, undistorted kick (no crackling or harshness)
- Good beater attack (the initial "thud")
- Strong low-end resonance (the rumble)
- No weird booming at any particular frequency
4. Adjust if needed: If the kick sounds boomy, move the microphone slightly away from the shell. If it lacks attack, move it closer to where the beater hits. Small adjustments make huge differences.
Common Beginner Mistakes with Kick Drum Recording
Setting input level too hot: Clipping the kick drum input is the most common beginner mistake. Set conservatively so you never hit red. You can add volume in mixing; you can't fix clipping.
Ignoring room acoustics: Recording a kick drum in a small, untreated room captures boomy resonance. If your kick sounds unnaturally boomy, the problem is your room, not your technique. Adding absorption (blankets, soft furniture) helps immensely.
Placing the microphone too far away: Beginners often fear the beater hitting the mic and place it too far. Move closer (safely) and capture more of that attack and impact.
Using the wrong microphone input: Using a condenser microphone designed for overhead cymbal work won't give good kick results. Use a dynamic microphone designed for drums.
Not protecting the microphone cable: The kick drum kicks—literally. Protect your microphone cable so it's not damaged during the session. Use cable ties or run it away from the danger zone.
Understanding and Using What You've Recorded
After recording, your kick drum file is ready for mixing. In your DAW, you can adjust gain, EQ, and compression to shape the sound further. The key is that your recording should give you good raw material to work with—good attack, good resonance, no distortion or weird booming.
If your recording sounds thin, you might need to add EQ enhancement in the low frequencies (80-120Hz) or add compression to glue the sound. If it's too boomy, cut unwanted resonance (usually around 200-400Hz). These are mixing decisions, not recording problems.
Taking Your Kick Drum Recording Further
Once comfortable with single microphone placement, experiment with dual microphones. Or try the outside placement to hear how different it sounds. Or add a room microphone 8-10 feet away to capture ambient kick drum energy. Each technique teaches you something about how kick drums produce sound.
For detailed information about kick drum microphones, recording techniques, and drum recording in general, read the complete guide to kick drum microphone.
Your First Kick Drum Recording
Recording a kick drum is one of the most rewarding things you can learn in home recording. The kick is the heartbeat of music. Getting it right gives you confidence for recording everything else. Don't overthink it. Use a dynamic microphone, place it correctly, set your levels, and press record. Your first attempts might need tweaking, but within a few sessions you'll be recording kicks that sound genuinely professional.
The joy of hearing a kick drum you recorded well—with real attack, real punch, real presence—is addictive. It teaches you that recording is learnable, that technique matters, and that great-sounding recordings come from understanding fundamentals. Start here. Master kick drums. Everything else follows naturally.


Comments