


Bass Drum Microphone article
The Complete Guide to Bass Drum Microphone
A quality bass drum microphone is essential for professional kick drum recording. Learn microphone selection, placement techniques and best practices for capturing excellent drum sounds.
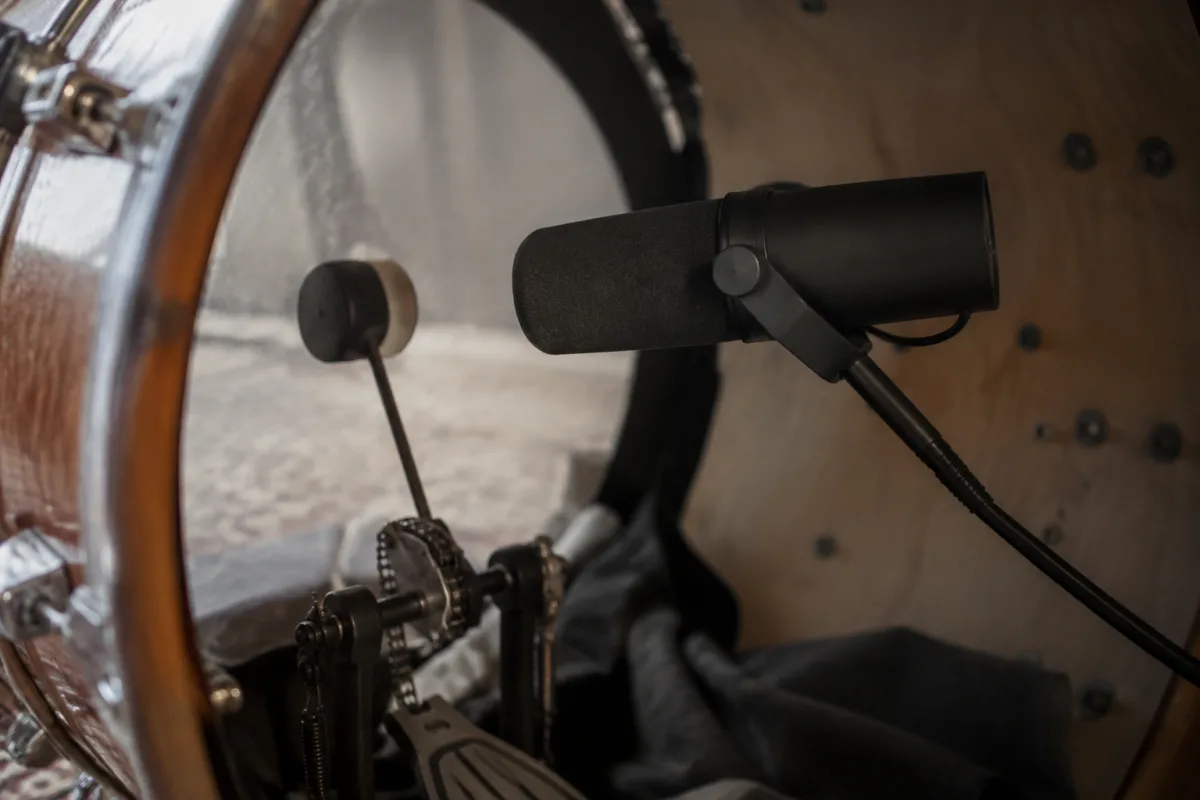
Recording a bass drum requires specialised microphone technique and equipment specifically designed to capture the instrument’s unique character. A quality bass drum microphone can transform a kick drum from a dull, indistinct thump into a punchy, defined element that anchors your mix. Whether you’re recording in a professional studio or building a home recording setup, understanding bass drum microphone technology and selection is essential for capturing compelling drum sounds.
What Is a Bass Drum Microphone?
A bass drum microphone is a specialised microphone designed specifically to capture the low-frequency content and transient detail of a kick drum. Unlike general-purpose microphones, a bass drum microphone is engineered to handle extreme proximity miking (often placed inside or directly in front of the drum head) and the substantial sound pressure levels that kick drums produce. The term encompasses several microphone types, each with distinct characteristics suited to different recording scenarios and aesthetic preferences.
The bass drum microphone serves a critical function in drum recording: translating acoustic energy into an electrical signal without distortion or tonal inaccuracy. Bass drums produce both low-frequency fundamental content (where the drum’s power resides) and high-frequency transient attacks (the beater strike and drum shell resonance). An effective bass drum microphone captures both, maintaining the instrument’s character whilst providing the engineer with flexibility during mixing.
Types of Bass Drum Microphones
Different microphone types excel in bass drum recording, each offering distinct advantages and limitations. Understanding these distinctions helps you select the microphone type best suited to your recording goals and aesthetic preferences.
Dynamic Microphones: By far the most common choice for kick drum recording, dynamic microphones are rugged, handle high sound pressure levels easily and offer a natural presence peak that works beautifully on kick drums. The Shure SM7B and Beta 52A are industry standards specifically designed for kick drum work. Dynamics are forgiving of technique mistakes and deliver predictable results across different playing styles.
Condenser Microphones: Some engineers prefer condensers for kick drums, particularly in genres emphasising the drum’s beater attack and shell resonance. Condensers offer greater frequency response detail and can capture subtle nuances that dynamics might miss. They require more careful technique and are more sensitive to handling noise, but their detailed character is sometimes precisely what a recording requires.
Ribbon Microphones: Vintage ribbon microphones can deliver exceptionally warm, coloured kick drum recordings. They are delicate and require careful placement, but their forgiving off-axis response and natural colour make them appealing for engineers seeking specific aesthetic qualities rather than flat accuracy.
Microphone Placement Techniques
Bass drum microphone placement dramatically influences the captured sound. The instrument’s proximity, angle and position relative to the beater side all shape the final result significantly. Most engineers employ one of several established placement approaches.
Inside Placement: Positioning the bass drum microphone inside the drum (typically beater side) is common in rock and pop recording. This placement offers isolation from other drums and captures powerful beater attack whilst minimising resonance of the resonant head. The proximity means sound pressure levels are extreme, requiring robust microphones, but the results are controllable and punchy.
Outside Front Placement: Placing the microphone in front of the kick drum, pointing at the resonant head, captures a more open, natural drum sound. This approach balances beater attack with the drum’s natural resonance. It provides less isolation from other drums but offers a more acoustic, less controlled character that suits jazz and acoustic genres.
Head Combination: Professional kick drum recording often uses dual microphones: one inside for beater detail and one outside for resonance. These are blended during mixing, giving engineers the ultimate control over the final sound. This is standard in higher-budget recording sessions where flexibility justifies the additional microphone and channel investment.
Key Specifications for Kick Drum Recording
| Specification | Importance | What to Look For |
|---|---|---|
| Max SPL | Critical | Minimum 140dB, ideally 150dB+ to handle extreme proximity miking |
| Frequency Response | High | Extended bass (under 40Hz) for fundamentals; presence peak around 4kHz for attack |
| Sensitivity | Moderate | Moderate to low sensitivity reduces handling noise and provides headroom |
| Proximity Effect | High | Proximity boost in bass adds punch; presence peak adds beater attack definition |
| Off-Axis Response | Moderate | Smooth off-axis response reduces drum shell harshness when miking inside |
Selection Criteria for Bass Drum Microphones
Choosing the right bass drum microphone depends on your recording budget, musical genre and technical requirements. A dedicated kick drum microphone like the Shure SM7B or Beta 52A offers professional results and unmatched reliability. These are standard in studios globally because they consistently deliver excellent kick drum recordings across diverse playing styles.
For home recording, a dynamic microphone from any reputable manufacturer is a sensible starting point. Even modestly priced dynamics designed for kick drums (often under £100) deliver substantially better results than general-purpose microphones. The investment pays dividends in improved drum recordings and reduced mixing effort.
Genre influences selection meaningfully. Rock and metal recordings often prioritise the beater attack and controlled punch, making inside placement with a dynamic microphone optimal. Jazz, acoustic and classical recordings sometimes benefit from outside placement capturing the drum’s natural resonance, potentially using condenser or ribbon microphones for detail. Experienced engineers often maintain multiple bass drum microphones for flexibility.
Technique and Best Practices
Achieving excellent bass drum microphone results requires attention to technique. Secure the microphone firmly to prevent movement during playing, use shock mounting to isolate from vibration, and use appropriate cables and connectors. Cardioid polar patterns are standard because they focus on the kick drum and reject other drums. Some engineers prefer omnidirectional patterns when recording multiple drums together for different aesthetic reasons.
Aim the microphone at the area where impact occurs (beater side), not directly at the drum shell surface where reflections might colour the sound. Allow space for the drum to resonate if recording outside; pressing the microphone directly against the drum head captures attack but sacrifices resonance character. Experiment with angle and distance to find your preferred balance.
Use a pop filter or foam windscreen designed for microphone use to reduce plosive noise from the drum head vibration. This is particularly important in home studios where room acoustics are less controlled. Professional studios often skip this step, accepting that post-production processing can address any issues, but for most situations, protection is worthwhile.
Conclusion
A quality bass drum microphone is an investment that transforms drum recording quality immediately. Whether you choose a professional standard like the Shure SM7B or a budget-friendly alternative, a dedicated kick drum microphone outperforms general-purpose options substantially. The microphone’s specifications, placement technique and integration into your overall recording chain determine the final result. With attention to equipment selection and proper technique, a bass drum microphone enables you to capture kick drums with the punch, clarity and definition that separates professional recordings from amateur attempts. For any serious drum recording work, a dedicated bass drum microphone is not optional—it’s an essential foundation.
Frequently Asked Questions
Can I use a regular microphone for recording kick drums? Technically, yes, but a dedicated kick drum microphone delivers superior results. The specialised frequency response and high SPL handling are difficult to replicate with general-purpose microphones.
What’s the best placement for a bass drum microphone? Inside (beater side) placement is most common for rock and pop, offering isolation and punch. Outside placement suits jazz and acoustic genres. Many professionals use both positions.
Do I need to use phantom power for a kick drum microphone? Most dynamics don’t require phantom power. Condenser microphones do. Check your microphone specifications to confirm its power requirements.
How close should I position the microphone to the kick drum? Inside placement often means the microphone sits directly on or very near the beater side head. Outside placement is typically 6–12 inches from the resonant head. Experiment to find your preferred balance.
Can one microphone handle both bass drum and tom recording? Technically yes, but results are compromised. Dedicated kick microphones are optimised for bass drum low frequencies, whilst tom microphones emphasise mid and high frequencies. Using dedicated microphones ensures optimal results.
What’s the maximum SPL rating I need for kick drum recording? A minimum of 140dB is acceptable; 150dB+ provides safer headroom, particularly for inside placement where sound pressure is extreme.


Comments