


Pad MIDI article
Pad Midi for Beginners: A Complete Guide
Intimidated by pad MIDI? Don't be. This beginner's guide takes you from unboxing to creating your first beat, with practical encouragement and easy-to-follow steps for nervous first-timers.
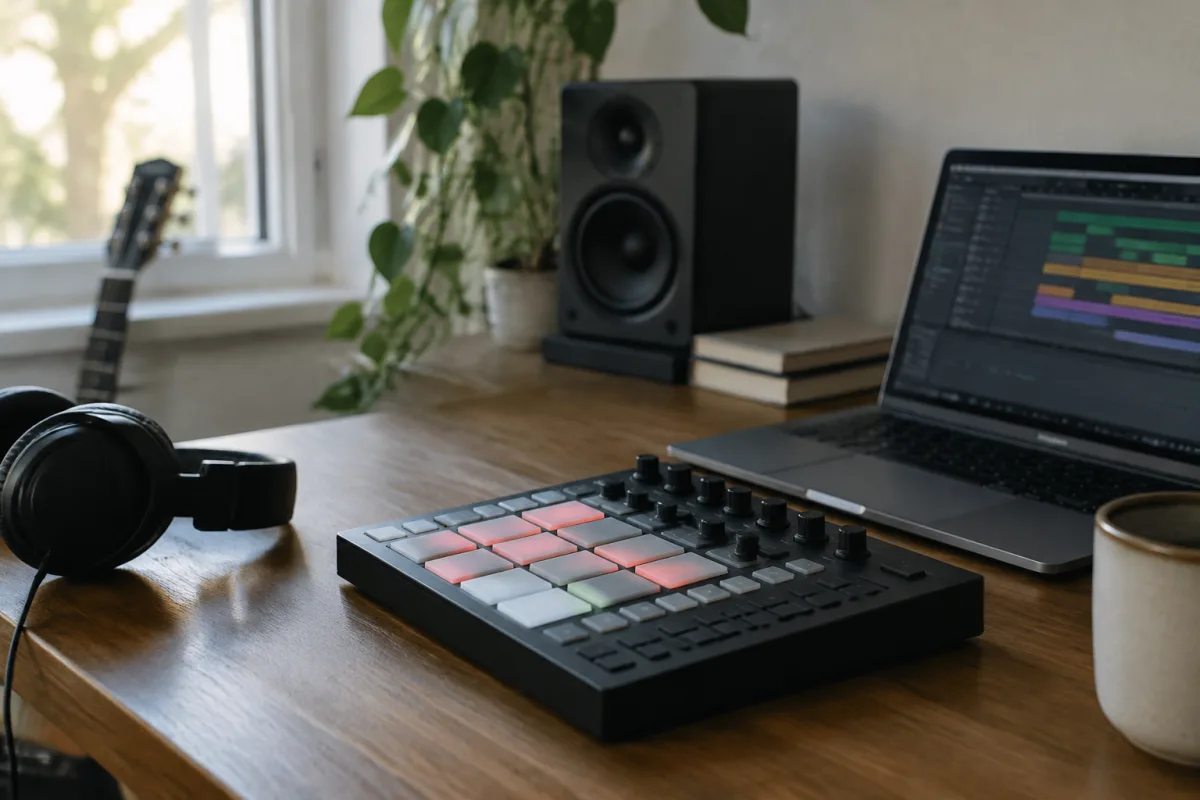
If you're new to music production, the prospect of using a pad MIDI controller can feel intimidating. But here's the truth: working with pad MIDI is more intuitive and forgiving than you might think, and it's one of the fastest ways to start making beats and triggering sounds in a modern music production setup. Whether you're interested in hip-hop, electronic dance music, or experimental soundscapes, pad MIDI opens creative doors without requiring years of keyboard training. This guide walks you through your first steps, demystifies the jargon, and shows you how to start making music with pad MIDI today.
What Exactly Is Pad MIDI?
A pad MIDI controller is a device with a grid of touch-sensitive pads that lets you trigger sounds, samples, or drum kits in your computer. Each pad can be assigned to a different sound—think of it as a percussion instrument in your hands, but instead of hitting drums, you're tapping illuminated pads. MIDI is simply the language your pad controller uses to communicate with your computer and music software. You don't need to understand the technical details; you just need to know that when you tap a pad, it tells your software to play a sound. That's it.
Unlike a piano keyboard, which requires understanding finger placement and musical theory to play well, pads encourage rhythmic, intuitive playing. Many successful producers picked up pad MIDI as their first instrument because the learning curve feels natural and the feedback is immediate and satisfying.
Your First Setup: Keeping It Simple
You need three things to get started with pad MIDI: a controller, a computer, and music software. For beginners, cheaper doesn't always mean worse. Many affordable pad MIDI controllers (under £150) are robust, reliable, and more than capable for learning. Popular beginner-friendly options include the Akai MPD218, Native Instruments Maschine Mikro, or even the Novation Launchpad Mini. Don't obsess over having the "best" gear; focus on having working gear that excites you.
Your computer just needs to be capable of running music software—even a modest laptop will do. As for software, free options like Reaper (with a generous trial period), Studio One (free version), or LMMS will let you start creating pad MIDI arrangements without spending money. Once you've learned the fundamentals and you're certain you love producing music, you can invest in professional software.
Connect and Prepare to Play
Connecting your pad MIDI controller is straightforward: plug it into your computer via USB, and install the driver software if your controller's manufacturer provides one. In your music software, select your controller as the MIDI input device. You should see lights respond on your pads when you tap them—this confirms everything's working. If nothing happens, don't panic; check that the software is listening to the right MIDI input and that the driver installed correctly. A quick Google search with your controller's model name and "not working" will usually reveal solutions.
Before you start making music, familiarise yourself with your controller's layout and sensitivity settings. Many controllers let you adjust pad sensitivity so that hard hits and soft touches feel natural to your playing style. Spend a few minutes just tapping pads and listening to how they respond. This isn't wasted time—it's building muscle memory and confidence.
Assigning Sounds to Your Pads
This is where pad MIDI becomes creative. In your music software, you create a new instrument track and assign sounds to each pad on your controller. A "sound" might be a drum sample, a synthesiser note, a vocal chop, or anything your software can play. Start simple: assign a kick drum to the first pad, a snare to the second, a hi-hat to the third. Tap your pads in rhythm, and you're making a beat. The beauty of pad MIDI is that experimentation is encouraged. Try unusual combinations. Use sounds that excite you, even if they don't fit traditional genre conventions.
Most music software comes with libraries of pre-made sounds and drum kits. Using these preset sounds is not cheating—even professional producers build tracks around pre-made kits before customising them. When you're starting out, using existing sounds lets you focus on rhythm and arrangement rather than sound design. As your skills grow, you'll explore creating your own sounds.
Starting Your First Sequence
Begin by creating a simple 4-bar drum loop using four to six pads. Set your software's tempo to something comfortable—around 90-100 BPM is a good starting point for most genres. Record a few bars of rhythmic patterns by tapping pads in time with your software's metronome. If you miss a beat or tap the wrong pad, don't worry—most software lets you undo mistakes easily. You can punch in corrections afterward or re-record sections until they feel right.
Your first loop won't be perfect, and that's perfectly fine. Legendary tracks often started as messy loops that producers refined over weeks or months. Focus on capturing the *feeling* of the rhythm you want, not absolute precision. Once you have a basic loop you like, save your project and listen to it back multiple times. You'll hear opportunities for improvement, variations, and embellishments on later listens.
Common First-Timer Mistakes to Avoid
Pressing too many pads at once is a common mistake when starting out. It's tempting to tap lots of pads rapidly, but this often produces chaotic, muddy sound. Instead, leave space between notes. Professional producers often employ "less is more"—silence and spacing are as important as the sounds themselves. Start by assigning one sound per pad and mastering straightforward patterns before adding complexity.
Another common pitfall is ignoring the volume envelope. Every sound has a volume curve—how quickly it peaks and how long it sustains. If sounds ring out forever or stop abruptly, they'll sound unnatural. Learning to adjust these parameters subtly makes an enormous difference. However, don't dive deep into sound design as a beginner. Use existing presets, and tweak only what's necessary.
Resist the urge to buy more gear too quickly. Many beginners think a second controller or a fancy microphone will unlock their creativity. It won't. Focus on mastering your current setup first. Adding layers to a simple foundation is far more powerful than starting with complex equipment you don't fully understand.
Overdubbing: Building Layers
Once you have a drum loop you like, add another layer. Create a new track for bassline or melodic elements. Many pads controllers let you play melodies by holding a modifier button and tapping different pads in sequence—this works brilliantly for adding simple, expressive melodies without needing piano keyboard skills. Record a melodic part over your drum loop. If it's imperfect, that imperfection often adds character.
Layer by layer, your track evolves. The third layer might be atmospheric pads or vocal samples. By this point, you've created an actual song structure—intro, main section, perhaps a breakdown. This process is how most modern music is made, and you've just accomplished it with nothing but a pad controller and patience.
The Most Important Step: Keep Going
Your first complete track probably won't sound professional. That's absolutely expected and not a reflection of your potential. Every producer whose work you admire started exactly where you are now—with imperfect recordings, uncertain rhythm feel, and a huge amount of excitement about the possibilities. Save your early tracks, finish them even if they're rough, and move on to the next project. Over time, you'll naturally improve without consciously trying to.
Join online communities of pad MIDI producers. Watch tutorials from other beginners—their mistakes and learning journey will resonate more than watching advanced tutorials. Share your early tracks (anonymously if you prefer) and welcome constructive feedback. Nothing accelerates learning faster than finishing projects and hearing honest reactions.
For a deeper exploration of pad MIDI and its applications across musical styles and production contexts, visit the complete guide to pad MIDI, which covers the full spectrum of what's possible with controllers and production workflows.
Your Next Session
The most valuable next step is to sit down, plug in your pad MIDI controller, and make something. It doesn't need to be good. It just needs to exist. That first imperfect loop is the foundation for your second, better loop. Your second track teaches you lessons you'll apply to your third. Before you know it, you'll have found your voice and developed a style that's entirely your own. The only barrier between you and that outcome is simply getting started and staying curious. Welcome to pad MIDI production.



Comments