


Bass Guitar Pedalboard article
Bass Guitar Pedalboard for Beginners: A Complete Guide
A beginner's guide to bass guitar pedalboards. Discover what you need, how to start small, and build your effects setup step by step.
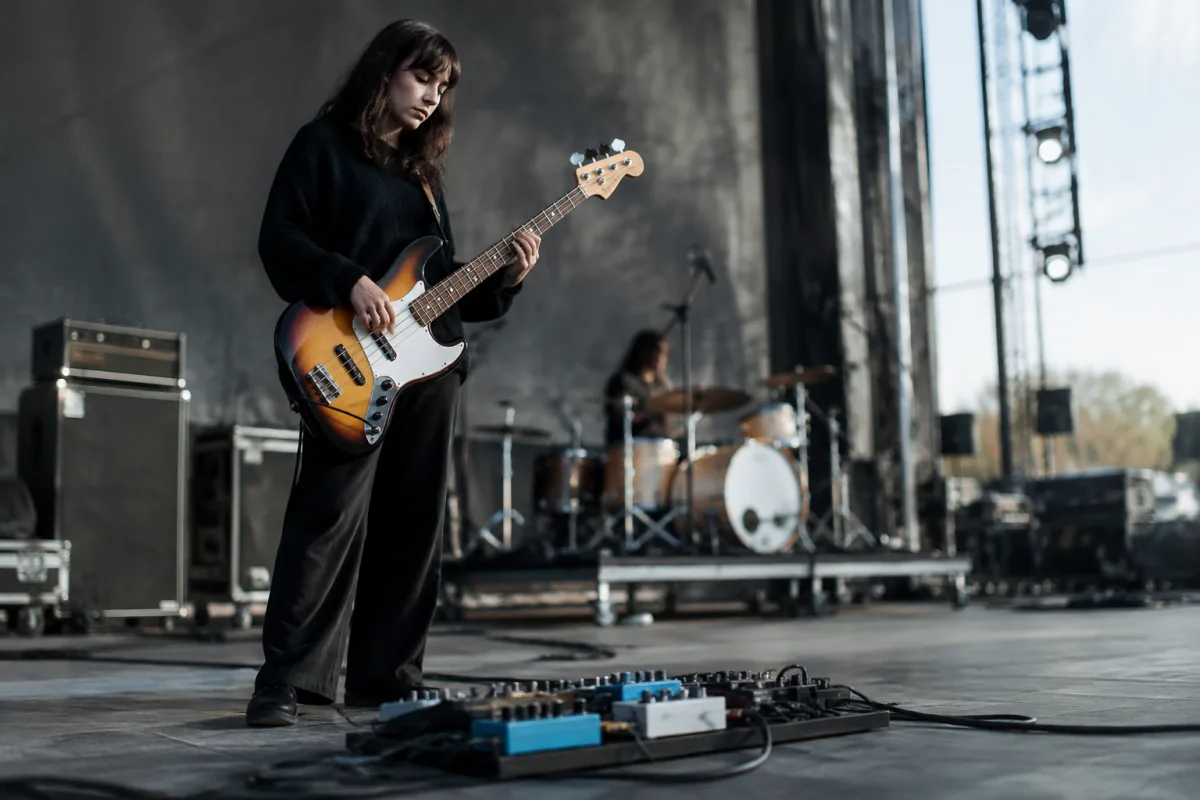
A bass guitar pedalboard—a flat board holding multiple effects pedals wired together—seems like an advanced musician's territory. In reality, building your first bass pedalboard is a logical next step once you're curious about effects. The challenge for beginners isn't complexity; it's not knowing where to start, what size makes sense, or whether adding effects is worth the investment. This guide walks you through the fundamentals: what a pedalboard actually is, why beginners consider them, how to start affordably, and how to expand confidently as your tone evolves.
What a Bass Guitar Pedalboard Is (And Why You Might Want One)
A bass guitar pedalboard is simply a board—typically plywood or aluminium, ranging from 1 to 4 feet long—that holds multiple effects pedals wired together. Connect your bass to the input pedal, play through the effects chain, and output to your amplifier. The board keeps everything organised, manageable, and portable. It's the hardware organisation system for effects—nothing more mysterious than a tool for convenience.
For beginners, a pedalboard becomes relevant once you're using two or three effects pedals. One pedal sits easily in a gig bag. Two or three pedals tied together individually are a mess to transport and set up. A pedalboard solves that organisational problem.
Do Beginners Really Need a Pedalboard? (Honest Answer)
Not immediately. If you're exploring bass effects for the first time, buy one or two individual pedals and play with them for several months. Use that time to discover your tone preferences. Do you like compression? Overdrive? Modulation? Understanding your sonic direction matters before committing to pedalboard real estate.
You'll know you're ready for a pedalboard when you consistently use multiple pedals and feel frustrated moving them between practise, rehearsals, and gigs. That frustration signals readiness. Until then, individual pedals are perfectly fine.
Types of Bass Pedalboards: Understanding Your Options
| Type | Size / Capacity | Price Range | Best For |
|---|---|---|---|
| Pedaltrain-Style (Metal Boards) | Compact to large (varies) | £100–300 | Gigging musicians, organised pedalboard architecture |
| DIY Pedalboard (Plywood) | Customisable | £30–80 | Budget-conscious players, unique layouts |
| Powered Pedalboards | Moderate to large | £200–600 | Players wanting built-in power distribution |
| Soft Pedalboards (Gigbag-Style) | Small, portable | £80–200 | Minimal setup, maximum portability |
Starting Small: Your First Pedalboard Doesn't Need to Be Huge
Many beginner bass players build oversized pedalboards with room for future pedals that never materialise. You end up carrying extra weight and bulk. Instead, start with a board that fits your current setup plus one or two empty spaces for future additions. A small Pedaltrain board or DIY plywood board (24 inches wide) holds three to five pedals comfortably and remains portable.
You can always upgrade to a larger board later. Starting small forces thoughtful pedal selection and teaches you your actual sonic needs before commitment.
Essential Pedalboard Components: The Unglamorous Stuff That Matters
Beyond the board itself, beginners overlook these crucial items:
- Power supply: Don't rely on batteries or cheap wall adapters. A quality isolated power supply (£60–150) distributes stable power to each pedal. This prevents noise, hum, and reliability issues. Beginner's temptation: skipping this. Professional's requirement: never skip it.
- Patch cables: Connecting pedals together requires short, quality patch cables (not instrument cables—different standard). Budget £20–40 for a good set. Cheap cables introduce noise and connection issues.
- Instrument cable from bass to pedalboard: Quality matters. Cheap cables sound dull. Budget £15–25 for a good instrument cable.
- Output cable from pedalboard to amplifier: Another quality cable (£15–25). This signal path directly affects tone.
- Velcro or mounting system: Keep pedals from sliding during transport. Velcro strips (£5–10) work; professional mounting systems exist too.
Common Beginner Mistakes When Building Bass Pedalboards
- Buying a massive board for three pedals: Overkill creates transport nightmares. Start small; expand only when necessary.
- Skimping on power supply quality: Cheap power introduces hum and noise that undermines your effects. Invest in isolated power from day one.
- Using instrument cables as patch cables: Instrument cables are too long and unshielded for pedalboard use. Use short patch cables specifically designed for pedalboards.
- Overcomplicating signal flow: More pedals doesn't equal better tone. Start with compression, maybe one filter or modulation pedal, and a tuner. Master those before adding more.
- Ignoring cable management: Tangled cables look unprofessional and cause connection problems. Manage cables with clips or trays. Neat pedalboards feel more reliable.
- Building without considering transportation: A heavy board that doesn't fit your gig bag creates logistical nightmares. Measure your vehicle and gig bag capacity before building.
Building Your First Pedalboard: Step-by-Step
- Inventory your current pedals: List every pedal you own or plan to buy within six months. Typical starter combos: compressor + tuner, or overdrive + tuner + compressor.
- Choose a board size: A 24–30-inch board holds three to five pedals. Measure your current and potential-future setup; add 2 feet of extra length for expansion.
- Buy the board and mounting: Pedaltrain boards are industry standard and last forever. DIY plywood works if you're handy. Budget £60–150.
- Arrange pedals on the board: Plan signal flow: tuner first, then effects in your preferred order, usually compression → filters/modulation → overdrive/distortion. This is a starting point; adjust based on your tone.
- Purchase power supply and cables: Isolated power supply (£80–120), patch cables (£25–40), instrument cables (£30–50). This costs more than the board, but it's essential.
- Wire everything together: Connect pedals with patch cables, pedals to power supply with barrel connectors. Use cable management to keep it neat.
- Test and adjust: Play through your complete setup. Notice tone changes. Adjust pedal order if necessary. This tuning phase takes days to weeks.
Understanding Bass Pedalboard Signal Flow (Without Overthinking)
Signal flow is the order your bass signal travels through effects. A typical bass pedalboard flow looks like this:
Bass → Tuner → Compressor → Filters/Modulation → Overdrive/Distortion → Amplifier
Why this order? Tuner goes first (needs clean signal for accuracy). Compression next (cleans up dynamics before other effects see them). Modulation/filters in the middle (they colour but don't distort). Overdrive/distortion last (it colours everything before it). This isn't a rule—just a common starting point. Experimenting with different orders teaches you tone possibilities.
Expansion: Growing Your Pedalboard Over Time
Start with three pedals maximum. Master their interactions. After three to six months, add one new pedal and spend another three months learning it. This gradual expansion teaches you tone development rather than overwhelming your ear with simultaneous new gear.
Common additions in order:
- If you don't have compression, add it.
- If you don't have a tuner, add it.
- Add modulation (chorus, flanger, phaser) for textural depth.
- Add overdrive or distortion for character.
- Add a reverb or delay for space and ambience (less common in bass than guitar, but effective).
Budget Guidance for Beginners
Minimal starter pedalboard (£300–500 total): Small DIY board + 2 quality pedals (tuner + compressor) + power supply + cables.
Solid beginner pedalboard (£600–1,000): Pedaltrain small board + 3–4 quality pedals + good power supply + quality cables.
Professional beginner setup (£1,000–2,000): Pedaltrain medium board + 5–6 quality pedals + powered pedalboard or excellent separate power + quality everything.
Beginners should stay in the £500–800 range initially. This buys solid gear without overcomplicated investment.
Transportation and Care: Keeping Your Pedalboard Safe
Once you build a pedalboard, protecting it matters. Invest in a padded pedalboard gigbag (£40–80). Protect cables in a small cable pouch. At gigs, keep your pedalboard on a stable, elevated surface away from spilled drinks and careless feet. Before transport, unplug all cables and secure pedals with velcro to prevent shifting.
Your First Pedalboard Journey
Building a bass guitar pedalboard is a natural evolution for players discovering effects. Start small, invest in quality power and cables (the unsexy but essential infrastructure), and expand thoughtfully as your tone preferences develop. Within six months, you'll understand your sonic identity. Within a year, you'll be advising other beginners on pedalboard strategy.
For comprehensive information on specific pedal types, advanced signal routing techniques, and how professional bass pedalboards operate, consult our complete guide to bass guitar pedalboards. This beginner guide covers first steps and confidence. The complete guide covers everything else.


Comments