


Sampler Drum Pad article
Sampler Drum Pad for Beginners: A Complete Guide
Stepping into sampler drum pads doesn't have to be overwhelming. Start with basic patterns, master velocity control, and watch your groove develop from day one.
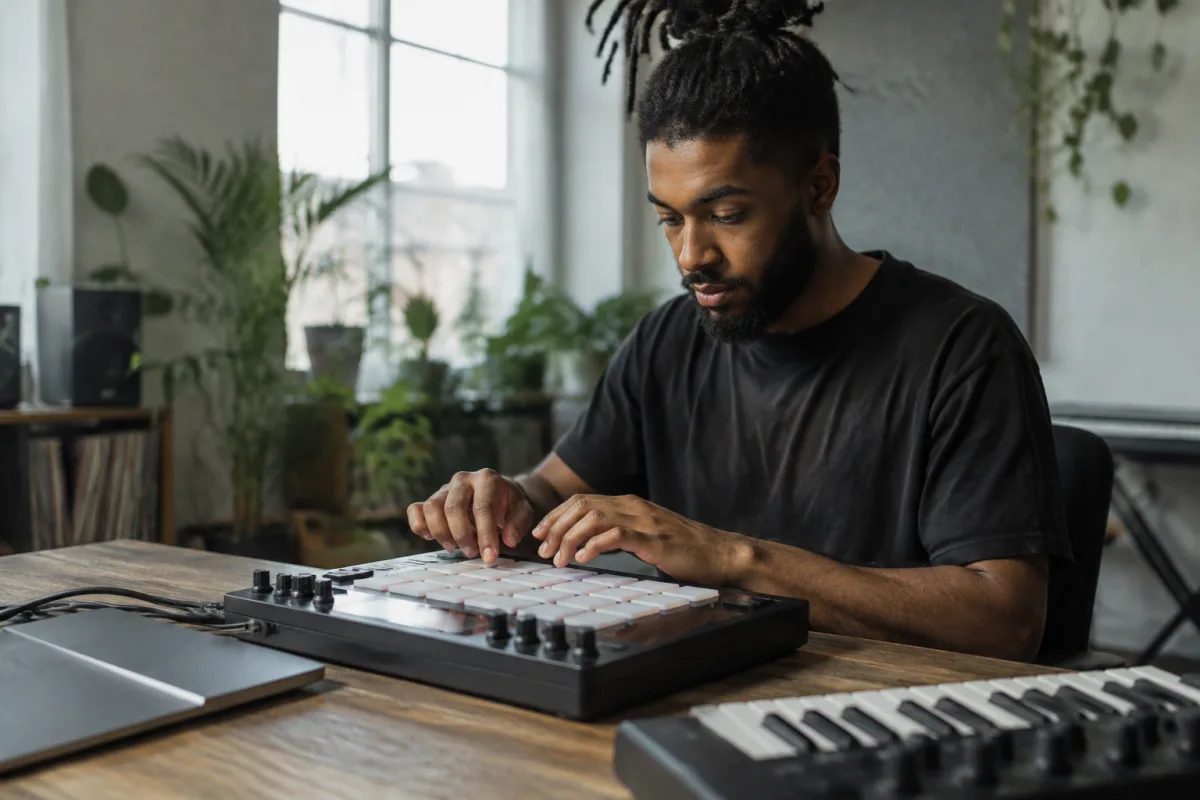
Your First Sampler Drum Pad: Getting Started the Easy Way
Stepping into the world of sampler drum pads can feel overwhelming at first. You see producers at work, fingers flying across illuminated squares, and wonder how they make it look so effortless. The good news: it really isn't as complicated as it looks, and you can start making music with a sampler drum pad today with just a few fundamentals under your belt.
What You'll Need Before Day One
Before you unbox your first sampler drum pad, make sure you've got the basics sorted. You'll need a computer (Mac or Windows both work fine), a USB cable or audio interface to connect your pad, and ideally some headphones or speakers. That's genuinely it. Many beginners overthink the setup, thinking they need a recording studio, but you don't.
Software is your other essential. Most sampler drum pads come with a DAW (Digital Audio Workstation) like Ableton Live Lite or FL Studio Fruity Edition included. These free versions are absolutely capable for learning. If you're starting with nothing, download one of these and you're ready to go.
Starting Simple: Your First Pad Layout
A sampler drum pad typically has 16 squares arranged in a 4×4 grid. New players often load dozens of sounds and get paralysed by choice. Resist that urge. Start with the most basic layout: four drums on the first row (kick, snare, closed hi-hat, open hi-hat), four more percussion sounds on the second row (clap, tom, perc, crash), and leave the rest empty for now.
Why this simple start? Your fingers learn the pad layout much faster when things are consistent. You're training your muscle memory, not your ability to juggle 16 different sounds simultaneously. Once you can play basic patterns without thinking, you'll expand naturally.
Load sounds from your DAW's built-in library first. No need to hunt for premium sample packs when you're learning. Familiar drum sounds (like Ableton's default drums) will keep you focused on rhythm, not distracted by endless options.
The Most Common Beginner Mistake: Velocity Control
Here's the trap every beginner falls into: they tap all their pads with the same force, producing robotic, lifeless grooves. Sampler drum pads detect how hard you hit each square — they call that velocity. A soft tap sounds quiet; a hard strike sounds loud.
The fix is shockingly simple. Play like you mean it. Kick drums should be tapped firmly. Snares need a snap. Hi-hats should be light touches. Your kick and snare pattern will sound ten times better the moment you start varying the force you use on each pad.
Getting Your First Groove Down
Begin with the most fundamental rhythm in modern music: a four-on-the-floor kick (one kick per beat, four beats per bar) combined with a snare on beats 2 and 4. That's it. One measure, two sounds, eight taps. Get comfortable hitting that pattern smoothly at a steady tempo. Try 90 BPM first — it's slow enough to feel in control.
Once that feels natural, add the closed hi-hat on the eighth notes (twice as fast as the kick). Don't rush. Spend ten minutes just grooving on this foundation. You'll be shocked how musical it sounds once you nail the timing and velocity.
Only when that feels solid should you layer in more sounds. A producer didn't build interesting patterns overnight; they built them on top of solid four-on-the-floor foundations.
Recording Your First Patterns
Most DAWs let you play your pad directly into a track and record in real-time. Open an empty MIDI track, press record, and play your pattern. Make mistakes — they're part of learning. After you've recorded, you can always edit in the DAW or try again.
Don't aim for perfection on your first take. Humans play behind the beat slightly, rush occasionally, and vary velocity — that's what makes music feel alive. A perfectly quantised, robotic performance often sounds worse than a slightly imperfect live one.
Avoiding the Feature Creep Trap
Sampler drum pads have hundreds of buttons, modes, and features. Ignore 90 per cent of them for your first month. You don't need arpeggiators, chord mode, or complex effects. You need to develop timing and muscle memory with the sixteen pads and basic drum sounds. Everything else can wait.
Similarly, don't chase expensive sample packs. The sounds that come with your pad and DAW are genuinely good. Learn with them. Premium samples won't make you a better player; practice will.
The Path Forward: What Comes Next
After a few weeks of solid practice with your basic groove, you'll naturally want to expand. Add more variation to your hi-hat pattern. Layer in drums on different beats. Introduce fills between sections. Try adjusting the kick timing slightly behind the beat for a lazy, hip-hop feel.
Once basic timing feels secure, explore swing — a feature that shifts notes slightly off the grid for a looser, more human feel. Then start experimenting with different drum kits and sounds. You'll have instinctively learned which sounds sit together and which clash.
For the first time, watch a tutorial on note quantisation (snapping off-beat hits to the grid). This tool is genuinely helpful once you've trained your ear, but it's a crutch if you use it from day one.
A Final Word Before You Begin
Every producer who looks effortless on a sampler drum pad started exactly where you are: confused, uncertain, tapping pads slowly. The difference between them and people who quit is simply that they kept going. Your fingers need time to learn the geography of your pad. Your ear needs time to hear what good timing sounds like. Your brain needs time to connect intention to the fingers.
None of that happens in an afternoon. It happens in weeks and months of steady, patient practice. Start with a four-on-the-floor kick, a snare on 2 and 4, and enjoy the process. Everything else flows from there.
For deeper context on what sampler drum pads are and how they compare to other controllers, read our complete guide to sampler drum pads.


Comments