


Rackmount Mixer article
Rackmount Mixer for Beginners: A Complete Guide
A rackmount mixer looks different from traditional consoles, but the mixing principles are identical. This guide demystifies rackmount mixers for nervous beginners.
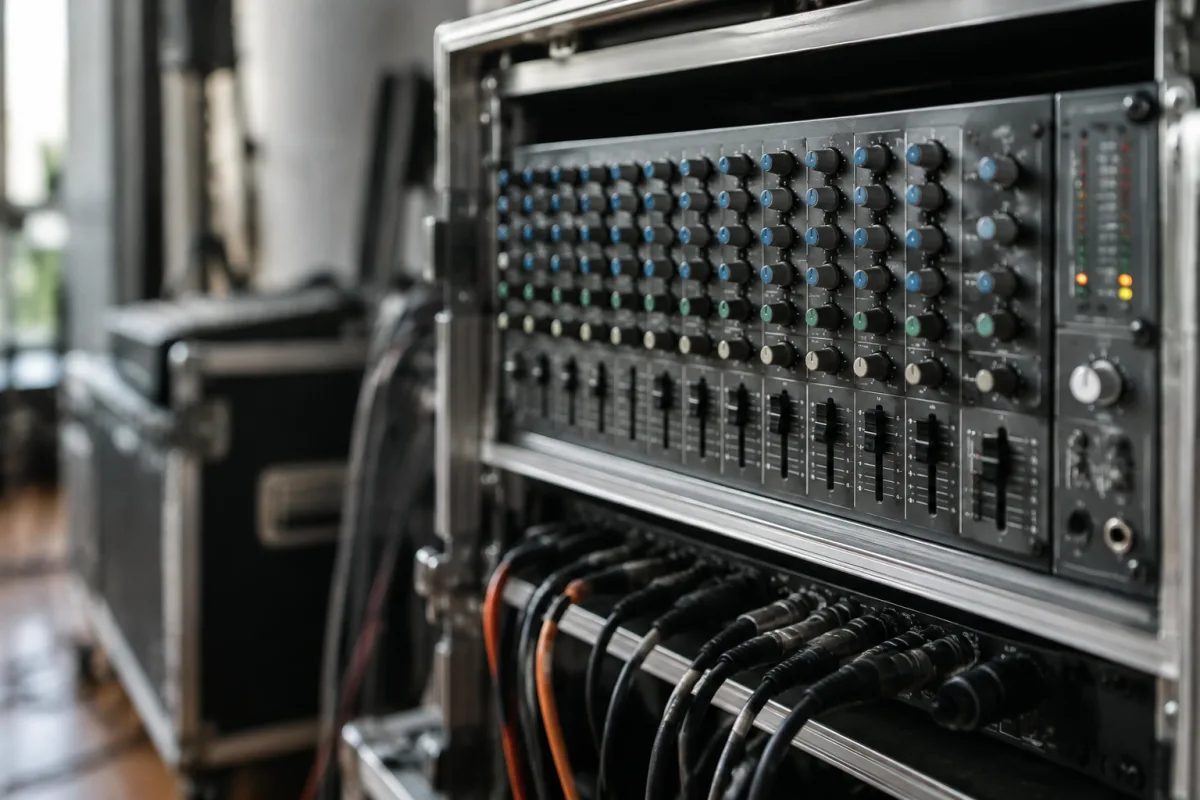
A rackmount mixer seems mysterious because it looks completely different from traditional mixing desks. This beginner's guide explains what a rackmount mixer actually is, why professionals prefer them, and how to operate one confidently without intimidation.
What Is a Rackmount Mixer, Really?
A rackmount mixer is a compact mixing device that slides into standardised steel racks used in professional studios and venues. Rather than the large desktop mixing desks beginners expect, a rackmount mixer is typically 2–4 inches tall, deep enough for cable connections, and shares the same audio blending functions as larger consoles. The core mixing principles remain identical—just packaged more compactly.
Why Choose a Rackmount Mixer?
Understanding the advantages of a rackmount mixer builds confidence in your choice. Professionals favour rackmount mixer systems for several reasons:
- Space efficiency: A rackmount mixer occupies minimal physical space compared to standard consoles, vital for touring professionals and crowded studios.
- Portability: Rackmount mixer units integrate into road cases, making transport straightforward for gigging musicians.
- Professional appearance: A rackmount mixer in a rack looks polished and organised, impressing clients and audiences alike.
- Simplified setup: Rackmount mixer units connect standardised XLR and cable routing, reducing confusion compared to large consoles with unlimited options.
- Cost-effectiveness: A rackmount mixer often costs less than equivalent desktop mixing desks, making professional-grade mixing accessible.
Physical Layout of a Rackmount Mixer
The compact rackmount mixer layout might seem cryptic initially. Let's demystify it:
Front Panel Controls
Most rackmount mixer models feature:
- Input level controls (gain pots) for each channel
- Channel faders controlling individual input levels
- Equalisation controls (usually shared across channels via buttons)
- Master volume controls
- Output metering (LED display or digital readout)
- Effects or auxiliary send controls
Rear Panel Connections
The rear of your rackmount mixer is where audio actually enters and exits. You'll find:
- XLR connectors: These balanced connections accept microphones and professional audio gear.
- Line-level inputs: RCA or 1/4-inch connectors for instruments and equipment.
- Main outputs: Where your mixed audio exits to speakers or recording devices.
- Auxiliary outputs: Separate sends for monitor mixes or effects processing.
Understanding rear-panel connectivity is actually more important than front-panel operation—a rackmount mixer's real complexity lives in cabling organisation.
Your First Steps with a Rackmount Mixer
Build confidence through a methodical approach:
Step 1: Plan Your Audio Routing
Before touching controls, map your audio sources. Which instruments or microphones connect to which rackmount mixer inputs? Write it down. This planning prevents cable chaos and confusion when using a rackmount mixer.
Step 2: Connect Cables Methodically
Connect each audio source to its designated rackmount mixer input. Label cables if you'll repeat setups. A well-organised rackmount mixer looks professional and operates reliably.
Step 3: Set Input Levels (Gain)
Enable audio on each source. Using the rackmount mixer's metering (if available), adjust gain controls until levels peak around -6dB. This provides headroom and prevents distortion. Proper gain-staging on a rackmount mixer is the foundation for great sound.
Step 4: Balance Channel Faders
Start all faders down on your rackmount mixer. Gradually raise each to hear individual sources. Then raise all faders together, listening to blend. This simple technique teaches how a rackmount mixer combines separate sources.
Step 5: Set Master Volume
Position your rackmount mixer's master fader around 75% initially. This leaves headroom. Adjust lower if signal peaks excessively, higher if signal seems too quiet.
Common Rackmount Mixer Beginner Mistakes
Avoid these pitfalls:
Ignoring Cable Organisation
Beginners often create tangled cable messes behind a rackmount mixer. Cable chaos leads to mistakes, noise, and future confusion. Label cables and route them neatly. An organised rackmount mixer setup prevents problems before they start.
Setting Excessive Gain
Rackmount mixer gain controls tempt aggressive adjustment. Resist this urge. Proper gain on a rackmount mixer is conservative—gain knobs around 2-3 o'clock typically suffice. Excessive gain causes distortion.
Forgetting Metering
If your rackmount mixer includes signal metering, watch it religiously. Metering guides proper gain-staging and prevents clipping. Many beginners ignore rackmount mixer metering and wonder why their sound distorts.
Adjusting Multiple Controls Simultaneously
When first using a rackmount mixer, change one element, listen, decide if improved. Multiple simultaneous adjustments create confusion. Methodical operation of a rackmount mixer teaches cause-and-effect quickly.
Overlooking EQ Subtlety
Rackmount mixer EQ controls can dramatically reshape sound. Use them gently. Extreme EQ on a rackmount mixer sounds artificial. Professional rackmount mixer use involves subtle tone adjustments.
Rackmount Mixer Versus Desktop Consoles
Understanding differences between a rackmount mixer and traditional desks reduces confusion:
| Feature | Rackmount Mixer | Desktop Console |
|---|---|---|
| Size | Compact (2-4 inches tall) | Large (12+ inches deep) |
| Portability | Excellent for touring | Fixed installation |
| Learning curve | Simplified, focused interface | Complex, many options |
| Cost | Often less expensive | Premium pricing common |
| Cabling complexity | Rear-panel intensive | Front-panel mixing |
Listening Is Your Best Teacher
Record yourself using a rackmount mixer at different settings. Listen back carefully. You'll immediately hear which adjustments improved your mix. This self-awareness on a rackmount mixer accelerates learning infinitely faster than reading rules.
Essential Maintenance Tips
Protect your rackmount mixer investment:
- Keep dust out: Use rackmount mixer dust covers when not in use, particularly in touring situations.
- Secure cabling: Velcro ties and cable management prevent strain on rackmount mixer connectors.
- Temperature control: Rackmount mixer components degrade in extreme heat. Ensure proper ventilation around your equipment rack.
- Power management: Use quality power conditioning to protect your rackmount mixer from voltage spikes.
When You're Ready to Advance
Once basic rackmount mixer operation feels comfortable, explore:
- Auxiliary sends for creating monitor mixes from your rackmount mixer
- Effects processor integration with your rackmount mixer signal path
- Automation capabilities if your rackmount mixer includes them
- Multi-track recording integration with your rackmount mixer outputs
For comprehensive rackmount mixer information and advanced techniques, visit the complete guide to rackmount mixer features and specifications.
Your Rackmount Mixer Confidence Awaits
A rackmount mixer looks intimidating because it's unfamiliar, not because it's genuinely complex. Cable organisation, proper gain-staging, and careful listening solve 95% of mixing challenges. Within days of hands-on operation, a rackmount mixer will feel like a natural tool, not a mystery machine. Start simple, listen carefully, and trust your instincts. You've got this.


Comments