


Mic a Violin article
Mic A Violin for Beginners: A Complete Guide
Nervous about recording your first violin? This beginner's guide covers microphone placement, distance, angle, and practical tips to help you capture beautiful violin sound from the start.
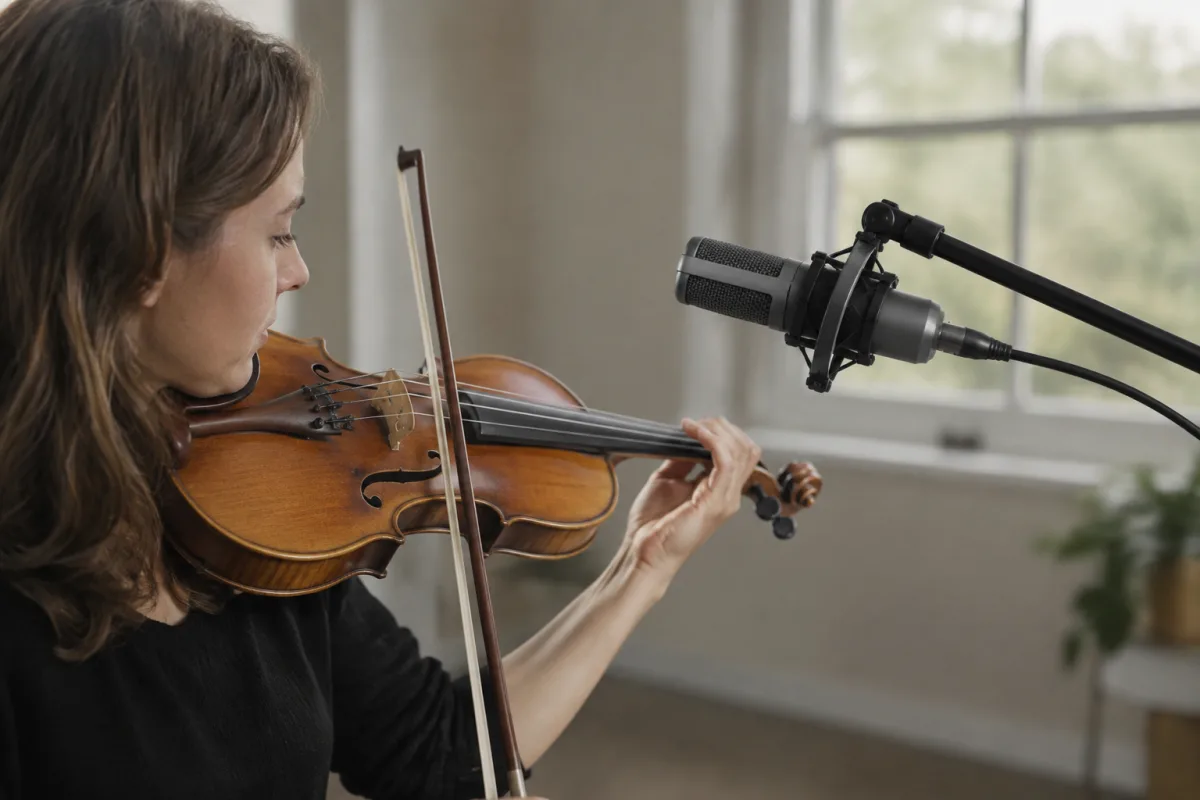
Recording a violin for the first time can feel like stepping into unfamiliar territory. You've got a beautiful instrument, but how do you capture its warmth and nuance with a microphone? The good news is that miking a violin doesn't require years of studio experience or expensive gear. With a bit of guidance and honest practice, even a nervous beginner can learn to mic a violin and produce recordings that genuinely sound good. This guide walks you through the essentials, focusing on the practical decisions you need to make and the mistakes that trip up newcomers.
Why Miking a Violin Feels Different at First
Violin is a deceptive instrument when it comes to recording. It sounds effortlessly beautiful in a room, yet capturing that beauty with a microphone is trickier than many beginners expect. The reason is simple: violin produces sound across a huge frequency range, and it's directional—the sound radiates differently depending on where you stand. A microphone placed poorly can catch screech, harshness, or muddiness instead of the richness you hear live.
The silver lining? Once you understand the basic principles of mic a violin, the process becomes intuitive and repeatable. You'll start getting predictable, lovely results, and the confidence that comes with that is worth the initial learning curve.
Choosing Your Microphone: Start Simple
Beginners often overthink microphone choice. You don't need a £2,000 instrument microphone to record violin decently. A good general-purpose condenser microphone—the kind many small studios use for vocals, acoustic instruments, and spoken word—is a brilliant starting point. Look for something in the £50–£150 range: affordable enough that you won't feel reckless, professional enough to sound genuinely good.
Why condenser? Condensers are sensitive and capture detail, which is exactly what violin needs. They also respond well to the directional nature of violin sound, meaning you can control what the microphone "hears" through positioning.
Common beginner mistakes when choosing a microphone:
- Buying a microphone primarily designed for vocals and expecting it to work perfectly on violin without adjustment. (It might work, but vocal mics are optimised differently.)
- Assuming a more expensive microphone automatically sounds better. Price often reflects build quality and features, not pure sound quality for your specific instrument.
- Skipping a microphone stand in favour of holding the mic or resting it casually. A proper stand is a game-changer for consistency and safety.
The Foundation: Mic Placement Distance and Angle
This is where most beginner mic a violin attempts go sideways. The distance between the microphone and the violin's bridge—the little wooden piece standing up on the instrument—is critical. Too close, and you'll record harsh, scratchy, and distorted sound. Too far, and you'll lose detail and pick up too much room noise. Too high or low, and you'll emphasize the wrong frequencies.
Here's the practical rule for beginners:
Place your microphone approximately 30–45 centimetres away from the violin's bridge, pointing at the bridge at a slight angle (roughly 45 degrees). The microphone should never point straight down at the violin; angle it gently to capture the instrument's natural radiation pattern. Most importantly, the microphone should be at or slightly above the bridge height, never below.
This starting position works for the vast majority of beginner mic a violin situations. Once you're comfortable, you can experiment with small adjustments. But resist the urge to adjust constantly; settle on a distance, record a brief passage, and listen before moving anything.
Avoid These Placement Disasters
Knowing what doesn't work saves enormous frustration. Here are the placement mistakes that doom beginner mic a violin recordings:
- Microphone too close to the strings: Placing the mic nearer than 20 centimetres captures the harsh scraping of bow against string rather than the true tone of the violin. Back up. You're trying to capture the instrument's overall sound, not the mechanics of playing it.
- Microphone positioned below the bridge: This catches bowing noise and the structural sound of the instrument rather than its resonant, musical tone. Keep the mic at bridge level or slightly above.
- Microphone pointing straight down or perpendicular to the violin: This emphasizes frequencies that don't sound natural. Use a slight angle—imagine the mic is listening to the violin as another musician would, not eavesdropping from directly overhead.
- Placing the mic near the tailpiece or chinrest: This captures nasal, unpleasant frequencies. The sweet spot is always the bridge area.
- Ignoring room reflections: A mic a violin close to hard walls or reflective surfaces can pick up undesirable echoes. Position yourself at least a metre away from walls when possible.
Gain and Recording Levels: Getting the Signal Right
Once your microphone is positioned, the next critical step is setting your recording level. This doesn't require sophisticated knowledge—it just requires listening and common sense.
When you play the violin at normal performance volume into your microphone, look at your recording device's level meter. You want the loudest passages to reach about three-quarters of the available headroom, leaving some safety margin so you don't clip or distort. If the meter barely moves, your microphone is too far away or your interface gain is too low. If it's maxing out immediately, lower your gain or move back slightly.
A beginner's mantra: if you're not sure, record a test passage, listen back, and adjust. It beats guessing and discovering a ruined recording later.
The Room Matters More Than You Think
Beginners often focus entirely on the microphone and violin, overlooking the room itself. A very hard, reflective space—like a tiled bathroom or empty bedroom—can make violin sound thin and echoey. A well-damped space—one with soft furnishings, curtains, bookshelves—sounds warmer and more forgiving.
You don't need a professional treatment to mic a violin effectively as a beginner. Simply recording in a room with furniture, curtains, and carpeting rather than in a bare space can transform your results. If your room sounds too live and bright, throw a blanket or two nearby to absorb reflections (but keep them away from the microphone's direct path).
Common Beginner Mistakes and How to Dodge Them
Learning from others' stumbles accelerates your progress. Here are the mistakes that consistently trap beginners attempting to mic a violin:
- Moving the microphone between takes: Even tiny shifts change the sound. Once you've positioned it and recorded a test, resist the urge to fiddle. Small movements accumulate.
- Expecting perfection on the first try: Professional recordings of violin involve multiple takes. You're learning, so give yourself grace and record several passes.
- Ignoring the bow: A freshly rosined bow sounds different from a worn one. Clean, consistent bow maintenance makes a bigger difference to recording quality than many beginners realise.
- Recording in total silence and expecting it to sound lively: A little ambient room sound actually makes violin recordings feel more natural. Dead, anechoic recordings can sound sterile. Don't obsess over eliminating every whisper of room tone.
- Assuming one position works for every violinist: If someone else plays your violin, the acoustic might shift slightly depending on their posture. Test and adjust if needed.
Your First Successful Mic a Violin Recording
Here's the step-by-step workflow to follow when you mic a violin for the first time:
- Set up your microphone on a stand at 30–45 centimetres from the bridge, angled at 45 degrees.
- Check your room: curtains drawn, soft furnishings in place. Avoid hard, reflective surfaces.
- Set your gain so that loud passages reach about 75 percent of the available level.
- Record a 30-second test passage at a normal performance volume.
- Stop, listen back immediately, and assess: does it sound like violin, or does it sound harsh, muffled, or weird?
- If harsh, move back slightly. If muffled, move a bit closer. If weird (thin, nasal, echoey), check your angle and room.
- Once you're happy with the sound, record your full take with confidence.
Follow this process, stay patient, and you'll be capturing excellent violin recordings as a beginner.
When You're Ready to Explore Further
Once you've nailed the basics of how to mic a violin and feel confident with your setup, there's a whole world of techniques and alternatives to explore: stereo miking, ribbon microphones, multiple positions, and more. For a comprehensive look at the full landscape of violin miking approaches, the complete guide to mic a violin covers advanced methods, gear comparisons, and professional workflows.
Conclusion: You're Ready to Record
Miking a violin as a beginner is less mystical than it feels before you start. Position your microphone thoughtfully, respect the distance and angle fundamentals, set your levels with a bit of common sense, and test before you commit to a full recording. The mistakes you'll make—and you'll make a few—are how you learn what works in your space with your gear. Within a session or two, you'll be producing violin recordings that genuinely capture the warmth and beauty of the instrument. That's not beginner luck; that's the result of understanding the basic principles and applying them consistently. You've got this.


Comments