


Pedal Riser Buying guide
Pedal Riser: A Complete Buyer's Guide
A practical guide to selecting and using pedal risers on your pedalboard, covering materials, sizing, placement strategies, and budget considerations for different setups.
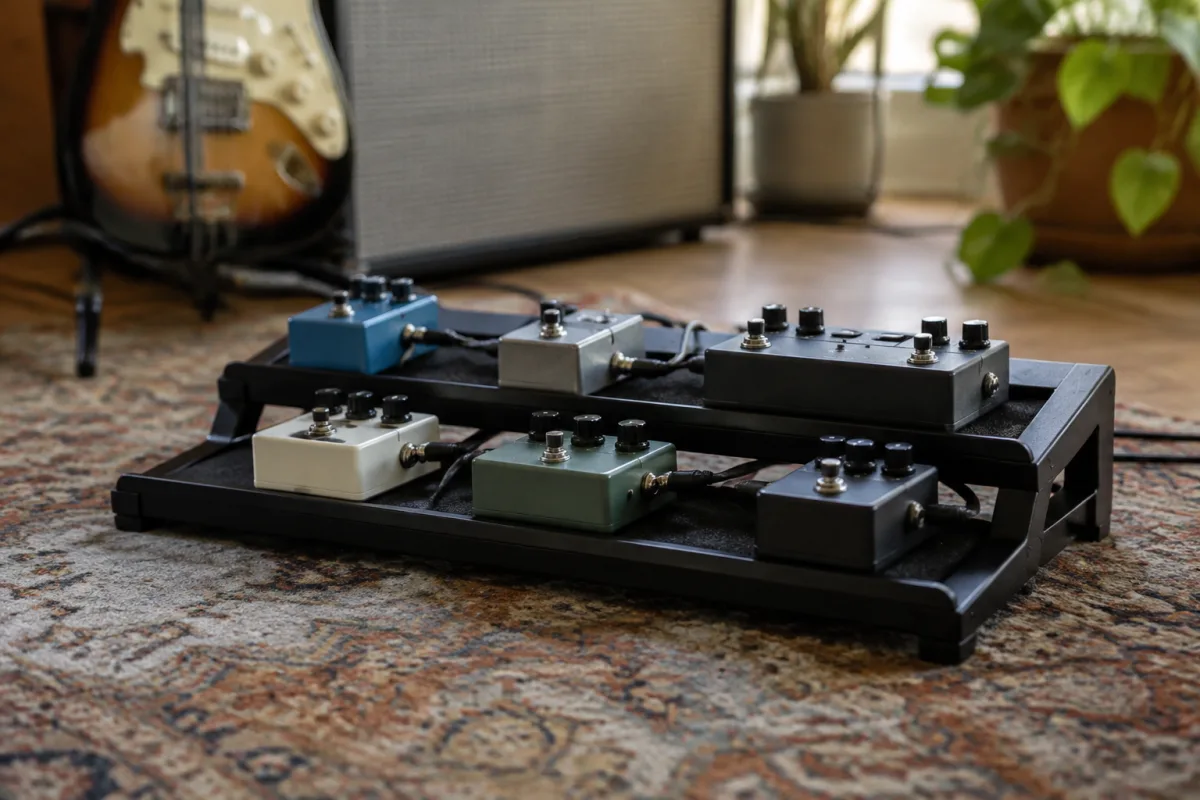
Buying Pedal Risers: Choosing the Right Platform for Your Board
Pedal risers—angled, elevated platforms for guitar effects—solve a real problem on crowded pedalboards: visibility and foot access. But the market is flooded with options, prices vary wildly, and not every riser suits every setup. This guide explains what pedal risers do, what specifications actually matter, and how to choose the right one without overspending.
Why Pedal Risers Matter
On a flat pedalboard, your eyes are far from the pedals, and your feet are fighting steep angles. A pedal riser elevates select pedals so you can:
- See your controls clearly: Knobs and switches become visible from waist height. You're not bending down to see what you're adjusting.
- Access pedals more easily: A riser brings frequently-used pedals into the foot-strike zone. You're not stretching awkwardly to hit a distant switch.
- Create pedalboard hierarchy: Risers let you prioritise certain pedals (drive, modulation) at front-and-centre while relegating others (reverb, delay) to the back or sides.
- Manage cable clutter: A riser lifts pedals off the board surface, creating space underneath for cable routing.
Risers aren't luxury—they're practical solutions for organised, gig-ready pedalboards.
Types of Pedal Risers
The market offers several riser designs, each with distinct advantages:
- Curved/wedge risers: The classic design—a simple angled platform. Light, affordable, minimalist. Best for holding one or two pedals.
- Vertical/tiered risers: Multiple levels stacked or side-by-side. Maximum height and organisation for multiple pedals. Heavier and more expensive.
- Modular risers: Stackable blocks or platforms you configure to suit your needs. Most flexible but require patience to set up correctly.
- Integrated pedalboards with built-in risers: Some pedalboards come with riser zones pre-installed. Most convenient if you're building from scratch.
Most players use a combination: a couple of wedge risers for key pedals, with the rest flat on the board.
Material and Build Quality
Pedal risers range from cheap plastic to premium ply. What matters:
- Weight capacity: A Fuzz Factory is light; a vintage Big Muff Plus is heavy. Verify the riser can hold your pedal stack without tipping. Cheap risers fail at 2–3 kg. Good risers handle 5+ kg easily.
- Stability: A riser that tips when you tap a switch is useless. Heavy, wide base is crucial. Test stability before buying if possible.
- Material durability: Plastic breaks under pedalboard stress. Plywood, MDF, or hardwood last years on the road. Pay slightly more for durability.
- Non-slip surface: Most good risers include rubber, foam, or textured coating to keep pedals from sliding during transport. Essential.
- Angle: 15–20 degrees is typical. Steeper angles (25+) are better visibility but worse foot access. Shallower angles (10–15) are easier to tap but harder to see. Choose based on your preference.
A quality riser costs £30–60 and lasts years. Cheap ones (£10–20) fail within months on tour.
Sizing: Height, Width, and Footprint
Pedal risers come in multiple sizes. Key measurements:
- Height: Typical risers are 10–20cm tall at the highest point. Taller risers improve visibility but reduce foot access and increase board footprint.
- Width: Most accommodate one pedal (15–20cm wide) or two/three (30–40cm wide). Measure your board width and plan accordingly.
- Depth: Typically 10–15cm. A deep riser takes up pedalboard real estate. Shallow is better if space is tight.
- Footprint:**On pedalboards, risers create a "dead zone"—space above the riser where no cables or power supplies fit. Factor this into your board planning.
Measure your board, identify which pedals you want elevated, and buy risers that fit without waste.
What to Elevate: Strategic Placement
Not every pedal deserves a riser. Choose strategically:
- Elevation priorities (high value): Drives, modulations, and time-based effects you adjust during songs. Tuner if you don't use a headstock tuner.
- Low priorities (can stay flat): Reverb, delay, and ambient effects you set once and forget. Power supply, switchers, and utility boxes.
- Never elevate (waste of space): Extremely heavy pedals (vintage combos), multiple pedals stacked flat already, or rarely-used specialty effects.
Ideally, your two or three most-accessed pedals sit on risers. The rest stay flat. This balances visibility and pedalboard economy.
Budget and Value
Pedal riser pricing:
- Budget risers (£10–20): Plastic, thin, unstable. Fail under touring stress. Avoid unless you're testing the concept.
- Mid-range (£30–50): Plywood or MDF, decent stability, reasonable build quality. This is where genuine value sits. A solid purchase.
- Premium (£50–100+): Hardwood, handcrafted, bespoke sizing. Beautiful, built to last decades. Worth it if you tour regularly or value aesthetics.
- DIY (cost varies): Build your own from plywood and non-slip material for £15–25. Surprisingly effective if you're handy.
For most players, a mid-range riser (£40–50) represents genuine value. You're not overpaying, and the durability is there.
Common Pitfalls When Buying Pedal Risers
Avoid these mistakes:
- Buying without measuring: A riser that doesn't fit your board footprint is wasted money. Measure first, buy second.
- Oversizing your riser: A massive riser for a single small pedal wastes board space. Fit the riser to the job, not the reverse.
- Prioritising aesthetics over stability: A gorgeous wooden riser that tips when you tap it is worse than useless. Stability matters first.
- Underestimating weight capacity: Stack three pedals on a "one pedal" riser and it tips. Know what you're putting on it.
- Stacking risers vertically (usually): Riser on riser on riser gets tall and unstable. Spread them across your board instead.
Specifications Checklist: Before You Buy
- Dimensions (height, width, depth) fit your pedalboard?
- Material is durable (plywood/MDF minimum, preferably hardwood)?
- Weight capacity exceeds your pedal weight?
- Angle (15–20 degrees) suits your preference?
- Non-slip surface keeps pedals from sliding?
- Stability (heavy base, not tippy)?
- Price represents value for your budget?
For a complete guide on pedal risers and pedalboard organisation, see our complete pedal riser guide, which covers all available models, materials, and applications in detail.
Conclusion
Pedal risers are modest tools that disproportionately improve a pedalboard's usability and organisation. Invest in one or two quality risers (mid-range, solid materials) for your most-accessed pedals, and your setup becomes instantly more tour-ready and pleasure to play. Measure first, choose solid materials, and prioritise stability over aesthetics. A well-placed riser transforms a flat, chaotic board into an organised, gig-ready weapon.
Frequently Asked Questions
Q: Do I actually need a pedal riser?
Not essential, but genuinely useful if you have a crowded pedalboard or frequently adjust pedals during playing. Risers improve visibility and foot access dramatically. Even one riser for your primary drive pedal makes a difference.
Q: How many risers should I buy?
Typically one to three. Elevate your most-accessed pedals (drive, modulation, tuner) and leave the rest flat. More than three risers usually creates an unstable, awkward board.
Q: Can I use a pedal riser for multiple pedals?
Yes. Multi-pedal risers exist (accommodating 2–4 pedals). They're heavier and take more space, but if you want several pedals elevated, they work well.
Q: What angle is best for a pedal riser?
15–20 degrees is standard and works for most players. Steeper (25+) improves visibility but reduces foot access. Shallower (10–15) improves access but hurts visibility. Choose based on what matters more to your playing.
Q: Is a wooden riser better than plastic?
Yes. Wooden (plywood, MDF, hardwood) risers are more durable, more stable, and last years under touring stress. Plastic risers fail within months on the road. Spend the extra £20–30 for wood.
Q: Can I stack risers on top of each other?
Generally not recommended. Vertical stacking creates height and instability. Spread risers across your board laterally instead. One exception: if your board is very narrow, stacking might be necessary—just ensure stability.
Q: Should I riser my tuner pedal?
If you use a pedalboard tuner, yes—elevation improves visibility. If you use a headstock tuner, no—your tuner is offboard and doesn't need space. Think about your setup first.
Q: Can I make my own pedal riser?
Absolutely. Plywood, a saw, sandpaper, and adhesive-backed non-slip material cost £15–25 and make a solid riser. DIY gives you exact sizing and saves money. Worth it if you're handy.


Comments