


Mic Acoustic Guitar article
Mic Acoustic Guitar for Beginners: A Complete Guide
Acoustic guitar miking beginner guide: position correctly, prevent feedback, play naturally, and capture authentic acoustic tone through practical experimentation.
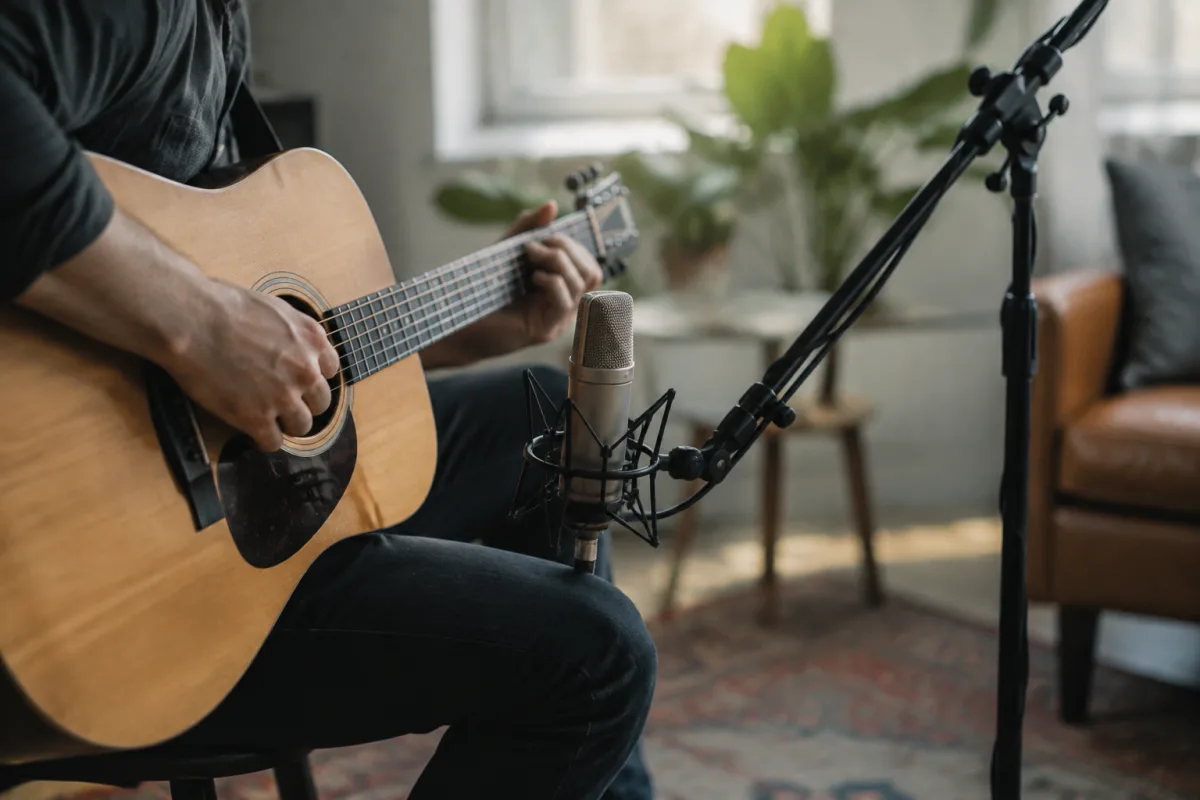
Miking an acoustic guitar for amplification seems like it should be simple—point a microphone at the guitar, turn it on, and play. In practice, beginners often encounter unexpected challenges: feedback, dull tone, proximity issues, or unclear sound that makes you question whether you've chosen the right microphone or approach. If you're standing in front of a microphone and an acoustic guitar wondering where to start, this guide walks you through the essentials. You'll learn microphone positioning, distance fundamentals, feedback prevention, and how to achieve clear, natural acoustic amplification within your first session. Miking acoustic guitar is genuinely learnable through simple, methodical practice.
Understanding Acoustic Guitar Miking Basics
Miking an acoustic guitar means capturing its sound with a microphone, then amplifying it through speakers or recording it. Unlike plugging an electric guitar directly into an amplifier (hardwired connection), acoustic miking is wireless and acoustic—the microphone captures air vibrations and converts them to electrical signals. This approach offers flexibility and natural tone capture but requires understanding microphone positioning and technique.
Why not just plug in an acoustic guitar using a pickup system? Pickups work but often sound thin or artificial. Miking captures the guitar's full acoustic character—the subtleties of wood resonance, string vibration, and body movement that define acoustic tone. Professional recording studios and live performances typically use miking because it preserves authentic acoustic character better than pickup systems.
Choosing Your First Microphone
For beginner acoustic guitar miking, you need a condenser microphone (not a dynamic microphone used for vocals). Condenser mics capture subtle acoustic details and high frequencies that define acoustic guitar tone. Look for affordable condenser options: brands like Audio-Technica (AT2020), Rode (Procaster), or similar offer quality miking at £100–200 new. Used condensers from trusted brands work equally well at reduced cost.
You'll also need a microphone stand (£20–50 for a sturdy desktop or floor stand) and an audio interface to connect the microphone to amplification or recording. An audio interface typically costs £80–200 and converts microphone signals into USB or digital format your amplifier or computer understands.
Your First Miking Session: Positioning Fundamentals
Set up your microphone on a stand positioned 6–12 inches away from the acoustic guitar's sound hole. Don't point the microphone directly at the hole—instead, position it at roughly a 45-degree angle. This positioning captures the full acoustic character without over-emphasising bass frequencies from the sound hole.
Turn on your audio interface and microphone. Plug your guitar, speak at normal volume near the microphone, and listen to the amplified signal. Adjust the gain (input level) so your voice sounds clear without distortion. Now play your acoustic guitar. Hear how the microphone captures its vibration and resonance? Stop here. You've successfully miked an acoustic guitar. That's literally the first milestone.
Fine-Tuning Distance and Angle
Move the microphone closer (3–6 inches) and play again. Notice how proximity emphasises certain frequencies? Move it further away (12–18 inches) and compare. The sweet spot typically falls between 6–12 inches, but this depends entirely on your guitar, microphone, and amplification. Experiment freely—you're learning through direct feedback, not theory.
Similarly, adjust the microphone's angle. Point it toward the sound hole, then gradually away toward the frets. Listen how each position colours the tone differently. The angle that sounds most natural and balanced to your ears is correct for your setup. There's no universal "perfect" positioning—context-dependent experimentation reveals the right answer for your specific situation.
Preventing Feedback: The Critical Issue
Feedback (that squealing or howling sound) occurs when amplified signal re-enters the microphone, creating a loop. Prevention is simple: keep the microphone away from speakers, position speakers behind or to the side of the microphone rather than directly in front, and reduce amplification volume if feedback persists. This is user technique, not equipment failure.
If feedback starts during playing, immediately reduce the volume knob on your audio interface or amplifier by half. The feedback stops instantly. Gradually increase volume again until you find the maximum level avoiding feedback. This practical experimentation teaches you the relationship between distance, angle, volume, and feedback instinctively.
Common Beginner Mistakes to Absolutely Avoid
The biggest mistake: pointing the microphone directly at the sound hole and maximising volume. This over-emphasises bass, introduces feedback instantly, and sounds unnatural. Position the microphone at an angle and moderate volume. This simple adjustment solves 90 percent of beginner miking problems.
Another frequent error: assuming expensive microphones sound dramatically better. An affordable condenser microphone positioned correctly sounds better than an expensive one positioned poorly. Positioning and technique matter far more than equipment cost at the beginner stage.
Beginners also often move the microphone constantly during playing, attempting to chase "better" positioning. Find a comfortable position, stabilise the microphone on a stand, and play for 30 minutes before adjusting. Constant repositioning prevents you from hearing the guitar's true character and learning what works.
Understanding Microphone Technique
Your playing technique affects miked tone. Play closer to the microphone with identical guitar position, and the sound changes. Play loudly versus softly with the microphone stationary, and dynamics change. These aren't microphone faults—they're natural acoustic characteristics. Learn to play at consistent volume, position your body consistently, and avoid moving during passages. This discipline makes miked tone more consistent and professional.
Some players build isolation or boundary treatment around their microphone (foam panels, cardboard baffles) to reduce room reflections and external noise. This is intermediate-level refinement—not necessary initially, but worth exploring after your first month of basic miking.
Recording Your Progress
Connect your microphone through an audio interface into your computer and record 30-second clips of yourself playing acoustic guitar. Listen back, comparing how it sounds amplified versus how you hear it acoustically whilst playing. Small differences in tone character are expected and normal. These recordings document your progress and become references for comparing different microphone positions.
Daily Practice and Refinement
Spend your first week playing acoustic guitar through your microphone setup at least once daily. Don't obsess over technical perfection—focus on playing music and hearing how your guitar sounds amplified. Your comfort and intuition about positioning develop naturally through repeated experience. After a week of daily miking, positioning becomes automatic.
For comprehensive information about acoustic guitar miking techniques and advanced recording approaches, refer to the complete guide to mic acoustic guitars, which explores detailed recording techniques and studio practices in depth.
Your Path Forward
Position your condenser microphone 6–12 inches from your acoustic guitar at a 45-degree angle to the sound hole. Connect it to an audio interface. Play for 15 minutes and record a sample. Listen back. That sound—clear, detailed, capturing your guitar's full acoustic character—is success. Everything beyond this first session is refinement and experimentation. You've already achieved the important part: capturing acoustic guitar tone naturally through a microphone. Celebrate this, then keep playing daily and let familiarity build your skill organically.



Comments