


Junior Drum Kit article
Junior Drum Kit for Beginners: A Complete Guide
Junior Drum Kit for Beginners: A Complete Guide
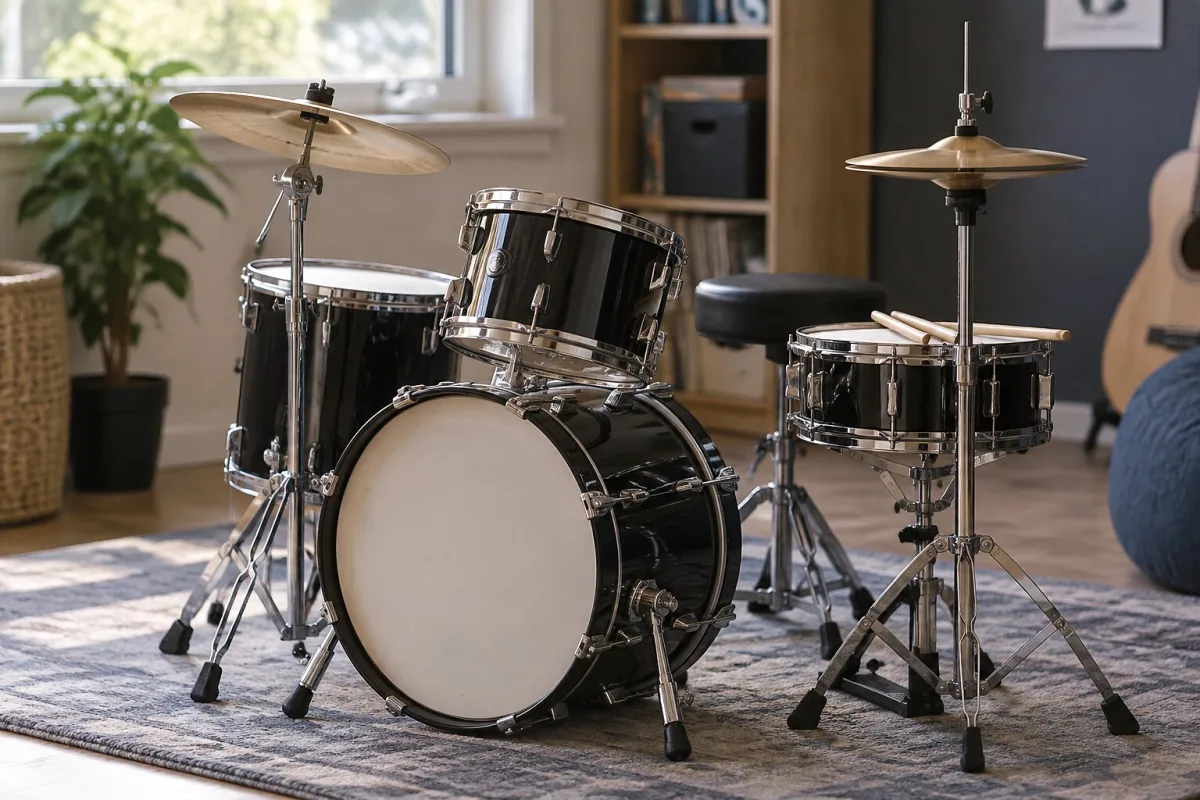
Starting on drums is exciting and overwhelming in equal measure. A junior drum kit is where most young drummers begin, and it's worth understanding what you're working with—not just the equipment, but how it responds to your playing and what it teaches you. The kit isn't just a collection of pieces; it's a system where every part influences how you learn and how you sound.
Why a Junior Kit is the Right Starting Point
A full-size drum kit forces a beginner to reach awkwardly, adjust their posture in ways that create bad habits, and work harder than necessary just to play the basics. A junior kit lets you sit comfortably, reach every surface without twisting, and focus on playing rather than contorting yourself. That comfort makes learning faster and more enjoyable.
The reduced size also teaches good technique from the start. Your arms learn natural reach. Your feet learn proper pedal movement. Your posture becomes aligned. These early habits stick with you. Start on a kit that fits, and your playing builds on a solid foundation. Start on a kit that doesn't fit, and you spend years unlearning poor technique.
The Basic Components You'll Use
A junior kit has the same basic parts as any drum kit: a bass drum, snare drum, tom drums, cymbals, hardware, and a throne. The difference is scale. The bass drum is smaller—14 to 18 inches instead of 20 to 24. The snare is around 10 to 13 inches. The toms are proportionally smaller. The cymbals are 12 to 14 inches instead of 16 to 20. Everything is closer together, lower, and easier to reach.
A three-piece junior kit—bass drum, snare, one tom—is what most beginners start on. It's simple enough that you can focus on one thing at a time without information overload. You learn bass-drum and hi-hat coordination, then add snare work, then toms. Adding pieces later, as you progress, keeps learning manageable.
Understanding How Your Kit Responds
Drums respond to how you play them. Hit the drum head near the edge and it sounds different than hitting near the centre. Hit softly and you get a quiet, controlled tone. Hit hard and the pitch changes slightly, the volume increases, and the tone opens up. This responsiveness is how drums teach you control.
The snare is where you learn this most obviously. A relaxed grip and light touch sound crisp and controlled. Tightening up and hitting harder produces a louder, different tone. Over months, your hands learn the relationship between touch and sound. That learning happens faster on a junior kit because the shells are thinner and more responsive than heavy, thick professional shells.
Your feet learn the same thing with the bass-drum pedal. A light foot movement produces a quiet thump. A firmer motion with the heel down produces a louder, more defined bass tone. The pedal teaches you what your foot does and why. A quality junior pedal responds well to this learning. A cheap pedal is sluggish and teaches poor habits.
Getting Your Setup Right
Setup is critical. Sit on the throne so your thighs are level or slightly angled downward, with your knees near a right angle. Place the snare directly in front of you, close enough that your elbows stay relaxed when you play. Position the bass-drum pedal so your foot rests naturally on it without stretching your ankle. Set the hi-hat within comfortable reach and the tom at a height that doesn't require raising your shoulders.
This setup feels strange at first if you're used to playing video games or sitting at a desk. Your posture is more upright, your arms are positioned differently, and your feet are active in ways they've never been. Spend a few minutes just sitting and getting comfortable before you start playing. Once the setup feels right, playing becomes natural.
Practising Basic Patterns
Start with simple patterns. Rock beats, blues grooves, and basic pop patterns use just four elements: kick on the bass drum, snare on two and four, hi-hat in steady eighth notes, and tom fills when you're ready. These patterns are simple but not trivial. They teach you how your hands and feet coordinate without overwhelming you with complexity.
Practice slowly. A metronome at 60 beats per minute, keeping time with your hi-hat and adding snare on beats two and four, is enough to build solid fundamentals. Speed comes later. Accuracy and consistency now create the foundation for speed later.
Taking Care of Your Kit
Drums are sturdy, but they need basic maintenance. Drum heads wear out—after a year or two of regular playing, a head may need replacement. When it sounds dull, won't hold tune, or cracks, it's time. A replacement head costs £10 to £30 and takes five minutes to install. Cymbals need the same attention. When a cymbal cracks or develops a permanent bend, it's done.
Hardware loosens over time. Check that all nuts and bolts stay tight. Use the drum key that came with your kit to adjust tension rods and tighten hardware. A loose tension rod makes a drum sound dead; tightening it brings the tone back. This maintenance is part of learning to care for an instrument.
When to Move to a Full-Size Kit
As you grow and your reach increases, you'll eventually outgrow your junior kit. This isn't failure—it's progress. Most drummers transition to full-size kits between ages ten and fourteen, but it depends on your height and how long you've been playing. When you can sit at a full-size kit and reach everything comfortably, that's when you know it's time.
A junior kit is not wasted money. It's where you learned to play. It teaches you more effectively than a full-size kit because it fits. Use it for as long as it serves your learning. Then move on knowing you've built solid fundamentals on a kit designed for you.



Comments