


Rack Amps article
Rack Amps for Beginners: A Complete Guide
Starting with rack amplifiers? Learn signal flow, power requirements, connectivity options, and how to avoid common beginner mistakes.
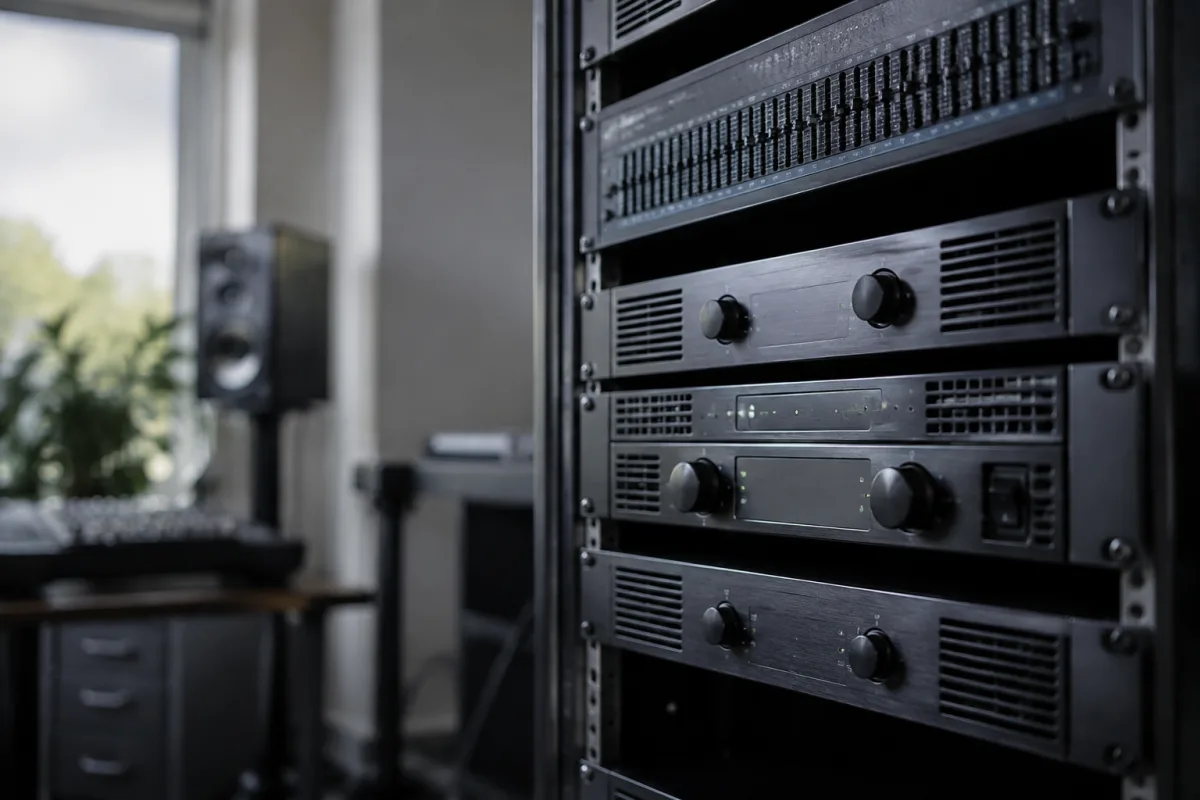
Rack amplifiers represent your first step into serious, flexible audio amplification. You've outgrown floor units, your band needs reliability, or you're building a professional sound system. If you're new to rack amps, the terminology and format might feel intimidating. This guide walks you through the essential fundamentals that every beginner needs to know about rack amplifiers, building confidence and helping you avoid the mistakes that frustrate new users unnecessarily.
Understanding What Rack Amps Actually Do
Before diving into technical details, clarify the basics. A rack amplifier takes a low-level audio signal (from a mixer, preamp, or keyboard) and amplifies it to levels powerful enough to drive speakers or headphones. Unlike guitar combo amps that combine amplifier and speaker, rack amps separate amplification from speakers, giving you flexibility. This separation means you can choose different speaker configurations, run multiple channels simultaneously, or integrate seamlessly into installed sound systems. For beginners moving from home studio to live sound or serious production, this flexibility becomes genuinely valuable.
Your First Connection: Signal Flow Essentials
Start with this fundamental understanding:
- Audio source (mixer, keyboard, microphone interface, etc.) sends a line-level signal to the rack amp's input.
- The rack amp receives this signal and amplifies it.
- The amplified signal goes to speakers via speaker cables.
- The speakers play the amplified audio at the volume level you've set.
This signal chain is genuinely simple: input → amplification → output → speakers. Everything else is variation on this fundamental flow. Understanding this basic sequence prevents confusion when you encounter specific models and features.
Power Output and What It Actually Means
Beginner buyers get confused by power ratings. Here's the practical reality:
- Wattage explains capability, not quality – A 1000W amp isn't necessarily "better" than a 500W amp. Wattage determines how loud the amp can push speakers, not how good it sounds. High wattage is overkill for bedroom mixing but essential for outdoor events or large venues.
- Match wattage to speaker capacity** – Speakers have power-handling ratings (typically 100-500W). Your amp's output should match or slightly exceed speaker rating. Underpowering (amp less powerful than speakers) sounds weak; overpowering significantly (amp way more powerful than speakers) can damage speakers through excessive volume.
- Real-world volume surprises beginners** – A 200W amp through modest speakers sounds genuinely loud. You don't need massive power for most applications. Beginner players often overestimate wattage requirements.
- Different measurement standards complicate comparison** – Some manufacturers measure continuously (RMS), others measure peak power. RMS figures are more accurate for real-world use. Compare within the same measurement standard or you'll make incorrect comparisons.
Match wattage intelligently rather than assuming more power is always better.
Cooling and Ventilation: Preventing Disaster
Rack amps generate significant heat and beginners often overlook this:
- Adequate airflow is absolutely mandatory** – Rack amps must have clear air intake and exhaust paths. Mounting them in enclosed racks without ventilation causes overheating and eventual failure. Plan cooling before installation.
- Rack spacing matters genuinely** – Don't stack other equipment directly above or below your amp. Leave at least 2U of clear space above for hot air to escape. This single consideration prevents expensive overheating damage.
- Monitor amp temperature visually** – Most rack amps have heat sinks you can see. During setup, observe that these sinks remain relatively cool to touch (not burning hot). If they're burning hot during normal use, you have a cooling problem.
- Fans are annoying but essential** – Some rack amps use active cooling (fans). While noisier than passive cooling, fans are genuinely crucial for sustained operation at power. Don't avoid fan-cooled models if needed for your application.
Cooling considerations are genuinely not optional. Neglecting them causes expensive amp failure.
Connectivity: Verifying Every Required Connection
Before purchasing, verify that your amp has every connection you need:
- Audio inputs** – How many input channels? Can you connect multiple sources simultaneously? RCA, XLR, or 1/4" connectors? Verify they match your equipment outputs.
- Speaker outputs** – Banana connectors, Speakon, or binding posts? How many speaker channels (mono, stereo)? Critical to match your speaker cable connectors.
- Level and volume controls** – Are there dedicated controls for each input channel? Can you control master output separately? These controls determine how easily you can manage levels during performance.
- Phantom power (if required)** – If you're using condenser microphones, you might need +48V phantom power supplied from the amp. Not all rack amps provide this, but some do. Verify if you need it.
- Signal monitoring** – Are there built-in VU meters or LED level indicators? These visual feedback tools help prevent signal distortion and clipping. Useful for beginners learning level management.
Verifying connectivity before purchase prevents post-arrival surprises and incompatibility frustration.
Common Beginner Mistakes with Rack Amps
New users typically stumble on these issues:
- Insufficient cooling and ventilation planning** – This is the number one cause of premature rack amp failure. Plan cooling before installation, not after problems appear.
- Overestimating power requirements** – Beginners buy 1000W amps when 300W would suffice, wasting money and creating cooling challenges. Estimate conservatively and upgrade later if needed.
- Speaker impedance mismatch** – Your amp has a minimum impedance it can safely handle (typically 4 or 8 ohms). Connecting lower-impedance speakers can damage the amp. Verify impedance compatibility explicitly.
- Not managing input levels properly** – Raw mixer output often signals too hot for clean amplification. Use input gain controls to prevent clipping and distortion. Beginners often leave input gain at maximum, resulting in constant clipping.
- Ignoring the need for a preamp** – Many rack amps are "power amps only" (they amplify signals but don't shape them). If you need tone shaping or mixing capabilities, you'll also need a separate preamp. Clarify whether your amp includes preamp functions.
- Not using quality speaker cables** – Cheap or damaged speaker cables cause hum, buzzing, or signal loss. Invest in proper speaker cables rated for your wattage. Don't cheap out on this critical connection.
- Neglecting to read the manual** – Rack amps have specific operational requirements (startup sequences, thermal management, input/output levels). Reading the manual prevents mistakes and dangerous operation.
Sidestepping these early mistakes accelerates your confidence with rack amps significantly.
Basic Operating Workflow
Here's how to operate a rack amp safely:
- Verify all speaker cables are connected securely (twist Speakon connectors until firm, ensure banana connectors are inserted fully).
- Set all input level controls to minimum (fully counterclockwise).
- Set the master volume control to minimum.
- Power on the amp and allow 30-60 seconds for the power supply to stabilise. You might hear a subtle hum or click—this is normal.
- Send a test signal (quiet audio from your source) to the amp.
- Gradually increase the input level for that channel until signal registers on any level indicators (if present).
- Gradually increase the master volume until you reach desired output level.
- Adjust individual channel volumes as needed during operation.
- After use, set the master volume to minimum, power down the amp, and allow it to cool for 10 minutes before relocating it.
This methodical sequence ensures safe, proper operation every time.
Practical Beginner Scenarios
Understanding real-world use cases helps you choose confidently:
- Home studio setup** – A 100-200W stereo rack amp drives studio monitors (powered) or passive speakers adequately. Clean, distortion-free output is the priority, not massive headroom.
- Live band performance** – A 300-500W amp handles typical venue requirements for bass, keyboards, or effects. Multiple input channels let you mix band members' signals simultaneously.
- Mobile DJ or sound reinforcement** – 500-1000W power handles outdoor events and medium-sized venues. Multiple channels provide flexibility for microphones, music sources, and effects.
- Permanent installation systems** – High-powered amps (1000W+) drive large installed systems. Professional-grade cooling and durability become essential at this power level.
Maintenance and Care Basics
Keeping your rack amp healthy requires basic attention:
- Keep the ventilation area clear—don't pile cables or equipment blocking airflow.
- Inspect cooling area monthly for dust accumulation. Dust accumulation impairs cooling efficiency.
- Listen for fan noises indicating cooling problems (unusual whining or grinding). Address these immediately.
- Perform gentle setup/shutdown sequences rather than abruptly powering on/off.
- If the amp will sit unused for months, power it up briefly monthly to keep internal components active.
- Have the amp serviced by professionals if problems develop. DIY repairs risk serious injury from high-voltage circuits.
Rack amps are robust and built to last decades with basic care.
Troubleshooting: When Things Don't Sound Right
Most beginner concerns have straightforward causes:
- No signal output – Verify speaker cables are connected, input sources are active, input levels aren't set to minimum, and the amp is powered on. Check these in order.
- Constant hum or buzz** – Usually indicates grounding issues between amp and source equipment. Ensure all equipment shares proper ground connections. Replace potentially damaged cables.
- Distorted or clipped signal** – Input level is too high. Reduce input gain gradually until signal cleans up. Distortion is your signal telling you it's too hot.
- Amp getting excessively hot** – Check ventilation (fans running? air flowing?), reduce ambient temperature if possible, verify speaker impedance is appropriate. If problems persist, have the amp professionally serviced.
Building Confidence With Rack Amps
Your first rack amp installation will feel technical. Within a few hours of practical experience, basic operation becomes routine. Within weeks, you'll handle level management, troubleshooting, and maintenance confidently. The learning curve is genuinely manageable. Rack amps reward systematic thinking and careful attention to fundamentals. Master the basics—signal flow, level management, cooling, speaker compatibility—and everything else flows naturally from there.
For broader context about rack amplifiers and how they fit into various audio systems, see the complete guide to rack amplifiers.
Key Takeaways for Your First Month
- Match amplifier power to speaker capacity, not to "sounds more powerful."
- Plan cooling and ventilation before installation—this is genuinely critical.
- Verify every connectivity requirement (inputs, outputs, impedance) before purchasing.
- Set input levels carefully—too high causes clipping and distortion.
- Use quality speaker cables appropriate for your wattage.
- Read the manual for your specific amp model—each model has specific requirements.
- Use the methodical startup/shutdown sequence every time you operate the amp.
- Monitor cooling performance visually during normal operation.
- Troubleshoot systematically: check connections, verify power, check levels, in that order.
You've got this. Rack amplifiers are genuinely straightforward once you understand the basics. Trust the process and enjoy the flexibility and reliability they provide.


Comments