


Drum Machine Analogue article
Drum Machine Analogue for Beginners: A Complete Guide
Starting with an analogue drum machine feels mysterious at first. This beginner's guide simplifies the learning process, takes you from zero to programming your first groove, and highlights the mistakes to avoid.
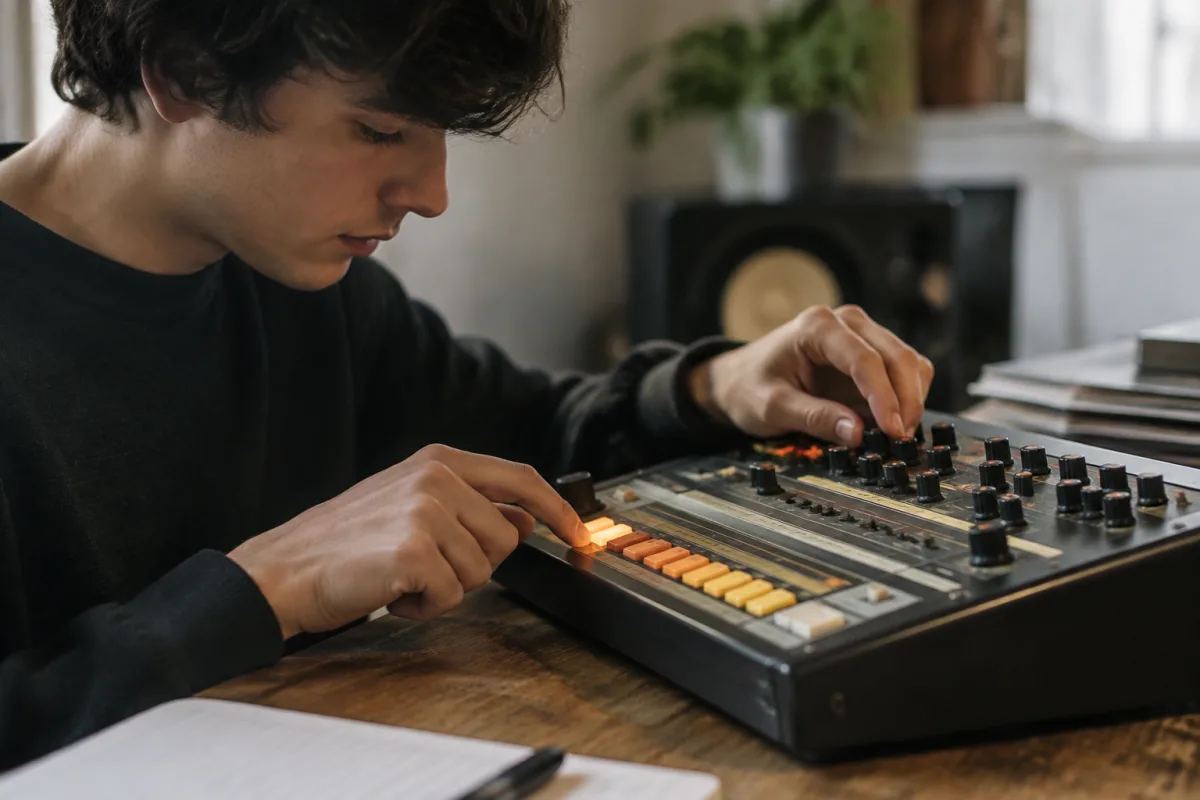
The prospect of learning an analogue drum machine can feel overwhelming. Mysterious knobs, cryptic labelling, no display screen, and no menu system leave beginners wondering where to even start. But the truth is far simpler: analogue drum machines are fundamentally straightforward instruments designed for immediate, hands-on control. Once you understand the basic principles—that each voice is an independent circuit, that knobs directly control sound, and that the sequencer is just a switch that repeats steps—you'll find yourself creating grooves within your first session. This beginner's guide will walk you through your first steps with an analogue drum machine, introduce the essential concepts without overwhelming jargon, and highlight the most common mistakes beginners make so you can sidestep them.
Before You Touch the Machine: Know What You Have
Analogue drum machines come in different flavours, and your first step is understanding which type you're learning. A classic analogue drum machine like a Roland TR-808 or Korg Volca Drum has separate voice circuits—usually kick, snare, hi-hat, clap, and tom voices. Each voice has its own set of knobs controlling the sound: pitch, decay, tone, and sometimes filter cutoff or resonance. A drum machine analogue sequencer sits separately, allowing you to program which voice plays on each beat.
Don't worry if this sounds abstract. The key insight is that every knob physically connects to the sound it makes. There's no hidden menu to dive into or software logic to decode. Turn the decay knob, and the kick drum rings out longer. It's that direct.
Your First Steps: Start With One Voice
The biggest beginner mistake is trying to understand all six or eight voices at once. That's a recipe for confusion. Instead, pick a single voice—usually the kick drum—and dedicate your first session to it alone.
Step one: Find the kick voice section on your analogue drum machine. Locate the input button or gate trigger for the kick, and ensure all other voices are muted (if your machine has mute buttons) or set to zero level (if controlled by faders).
Step two: Enable your machine's sequencer (usually a single power switch or "clock" button). Set the tempo to a slow, comfortable pace—60 BPM is fine. Program a simple pattern: kick on beats 1 and 3. Just press the trigger buttons or enable steps for beats 1 and 3 on the kick track.
Step three: Play with one knob at a time. Turn the pitch knob and listen. Turn the decay knob and observe how the kick sustains longer. Try the filter cutoff. Experiment with one control until you understand its effect, then move to the next. This is how you learn analogue drum machine logic—one knob, one lesson at a time.
Essential Concepts Every Beginner Should Know
Several core principles govern how analogue drum machines work:
- Envelope Controls: Most kick and tom voices have attack and decay knobs. Attack determines how quickly the sound starts; decay controls how fast it fades. A drum machine analogue kick with attack set to zero starts instantly; setting attack high creates a long rise-time that's less suitable for tight rhythm but interesting for sound design.
- Tuning and Pitch: Unlike samples, analogue drum machine voices are generated by oscillators. A pitch knob sets the base frequency. Lower pitch means deeper, darker tone; higher pitch creates brighter, tighter sounds. Experiment across the full range to understand how a single voice can produce vastly different characters.
- Sequencer Steps: Each row of buttons represents a beat or step. Most analogue drum machines use 16-step sequencers (a standard four-bar loop at normal tempos). Pressing a button lights it up, and when the sequencer reaches that step, it triggers the voice. This is your fundamental control for rhythm.
- Tempo Stability: Analogue drum machines run on internal clocks or external sync. Learn where your machine's tempo control lives, and mark the range (often 60–300 BPM). Some beginners expect drum machine analogue sounds to sync perfectly with software DAWs—they can, via MIDI or clock sync, but that's a second-step skill.
Your First Groove: A Three-Step Process
Once you've mastered the kick voice, creating a full groove is straightforward. Here's the simplest approach:
- Program the kick: On beats 1, 2.5, and 4 (the classic half-step pattern), create the rhythmic foundation. Listen for the pocket—does this kick pattern feel alive and groovy, or clunky?
- Add snare or clap: Switch to the snare voice. Program it on beat 2 and beat 4 (the backbeat, universal across pop, rock, and hip-hop). This creates the most recognizable rhythm with just two voices.
- Layer hi-hats: Finally, enable the hi-hat voice and program it for eighth-notes (every other step) or sixteenths (every step). This adds movement and drives the groove forward.
Congratulations—you've programmed a drum machine analogue groove using three voices. This is the exact workflow professional producers use, just scaled up with more voices, faster programming, and subtler sound design.
Common Beginner Mistakes and How to Avoid Them
Mistake 1: Maxing out all the knobs. New users often turn every control to full, creating a cacophony of sound. Analogue drum machine design emphasizes subtlety. Start with mid-range knob positions and adjust incrementally. You'll be surprised how responsive these instruments are to small changes.
Mistake 2: Not labelling the machine. After a week away from your drum machine analogue, you'll forget which knob does what. Tape masking tape under each control, write pencil notes beside the labels, or photograph the setup. Future-you will be grateful.
Mistake 3: Assuming the sequencer always stays running. Some analogue drum machines have separate run/stop controls. If you press buttons and hear nothing, check whether the sequencer is actually playing. This catches 90% of "Why isn't my drum machine working?" questions.
Mistake 4: Ignoring the output level. Analogue drum machines output line-level signals. If you're plugging directly into speakers and hearing nothing, check the master output level control first—it's often hidden on the back panel or at the bottom of the front panel.
Mistake 5: Overthinking tempo sync. Your first analogue drum machine beats should be standalone, not synced to anything. Master the fundamentals with a free-running sequencer before attempting MIDI sync or external clock inputs. Sync is a second-step skill that complicates early learning.
Moving Forward: What's Next After the First Hour
Once you've played with one or two voices and programmed a basic groove, explore these next steps at your own pace:
- Swing and shuffle: Most analogue drum machines have groove controls (called swing, shuffle, or feel). These offset certain steps slightly, creating human, jazz-like timing. This is where your grooves suddenly feel alive instead of robotic.
- Pattern variation: Learn whether your machine stores multiple patterns. Programming pattern A (intro), pattern B (verse), pattern C (chorus) allows you to arrange songs instead of playing endless loops.
- Accent controls: Some voices have accent inputs, letting you emphasize certain steps for extra punch. This is subtle but powerful for adding dynamics to your groove.
- Filter modulation: If your drum machine analogue has a filter with an envelope, experiment with filter decay on the kick or snare. This adds movement and interest to every beat.
You're Ready to Begin
Analogue drum machines reward direct, hands-on experimentation. Don't fear the unfamiliar interface—that's the whole point. Every knob you turn teaches you something about sound design, and every pattern you program is a victory. For more context on analogue drum machines and their place in music production, see our complete guide to drum machine analogue.
Your first session with a drum machine analogue will feel like playtime, not learning. That's exactly how it should be. Dive in, turn knobs, and listen. You'll be making grooves—genuine, musical grooves—within the first hour. Trust the process.


Comments