


Roland Rhythm Machine article
Roland Rhythm Machine for Beginners: A Complete Guide
Roland rhythm machine beginner guide: power on, load patterns, create beats in minutes, and enjoy music-making from your first session.
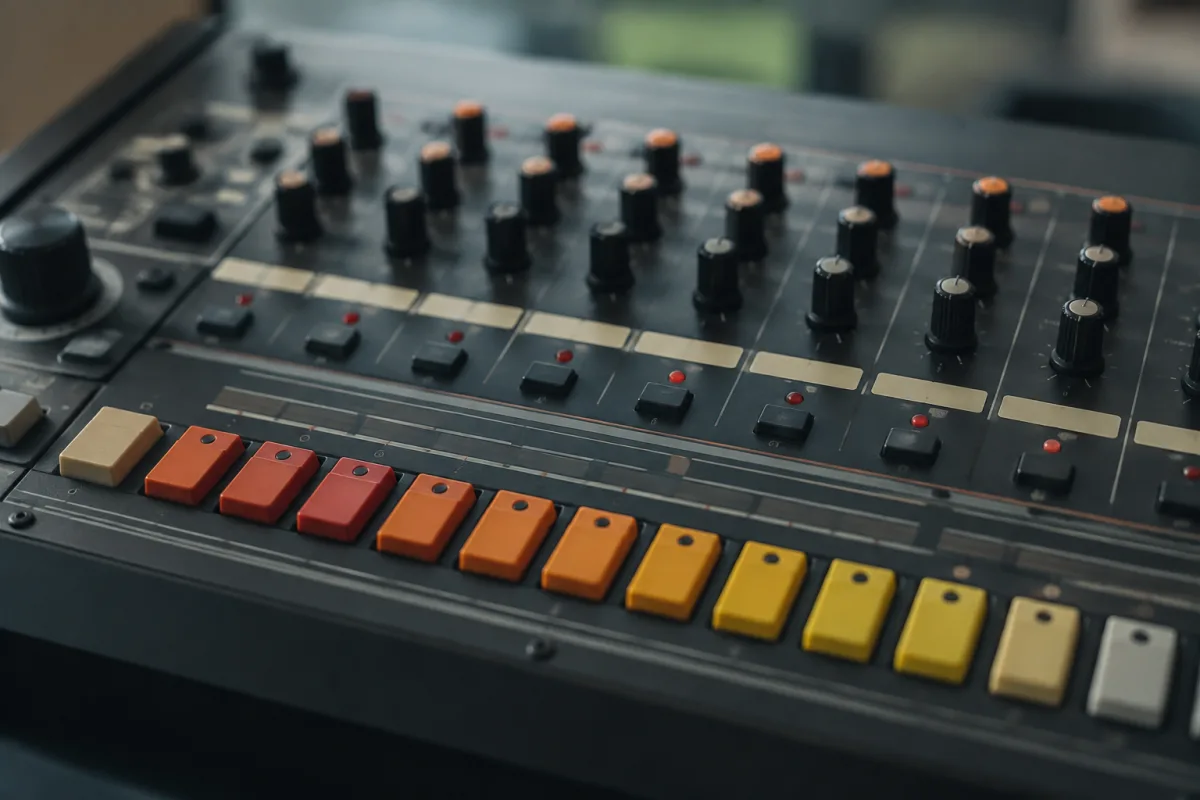
The Roland rhythm machine—whether the TR-808, TR-909, or contemporary models—can feel overwhelming at first glance. Buttons, knobs, sequences, drum patterns, and a display with abbreviations you don't recognise. If you've just purchased a Roland rhythm machine and you're standing in front of it wondering where to begin, this guide walks you through the essentials. You'll learn how to power on, create your first drum pattern within minutes, understand basic controls without complexity, and start making beats with genuine confidence. Roland's classic rhythm machines are designed to be intuitive—your first session will prove this immediately.
What Roland Rhythm Machines Do
Roland rhythm machines generate drum sounds and patterns. Load a preset drum kit, programme a sequence using the interface, and the machine plays back drum beats in real-time. Unlike drum machines requiring computer control, Roland units are standalone: power on, interact with controls directly, and hear beats immediately. This tactile, visual approach is precisely why Roland machines remain beloved across decades.
Powering On and Initial Setup
Connect the power supply and turn on the machine. Give it 10 seconds to boot. You'll see the display light and potentially hear an initialisation sound. Good. Now connect audio outputs to an amplifier or mixer so you'll hear what the machine produces. Without audio routing, everything sounds silent—frustrating and pointless.
Finding Your First Rhythm
Look for a "Pattern" or "Rhythm" menu. Press buttons to scroll through available patterns. Find something appealing—kick and snare combinations are good starting points. Select it and press "Play" or the dedicated play button. Your Roland machine now plays a drum rhythm. That's genuinely the core achievement: hearing beats generated by hardware you control.
Understanding Tempo Control
Every Roland machine has tempo control. You'll find either a tempo knob or tap-tempo button. Tap the tempo button rhythmically to set speed, or turn the tempo knob. The beats adjust to match your chosen tempo instantly. This immediate feedback is satisfying—you're controlling rhythm through intuitive physical interaction.
Creating Your First Pattern
Most Roland machines include step sequencers—grids where you activate steps to programme drum sounds. Select a drum sound (kick, snare, hi-hat), then press step buttons 1, 3, 5, 7 to create a simple kick pattern. Press play. You've just programmed a drum pattern. Stop here. You've accomplished genuine beat-making.
Common Beginner Mistakes
The biggest mistake: trying to understand every parameter before making any sound. Ignore 90% of features initially. Load a preset, press play, enjoy it. Exploration happens naturally through weeks of use.
Another error: creating overly complex patterns thinking more is better. Simple patterns (kicks on 1 and 3, snares on 2 and 4) sound musically satisfying and professional. Complexity comes later after mastering basics.
Daily Practice and Growth
Spend your first week loading different patterns, adjusting tempo, and enjoying how the machine makes beats. After one week, natural curiosity drives deeper exploration. You'll wonder about effects, pattern editing, or sound selection—answer these questions as they arise.
For comprehensive information about Roland rhythm machines, refer to the complete guide to Roland rhythm machines, which explores advanced features and professional workflows.
Your Path Forward
Power on your Roland, load a rhythm pattern, press play, and listen for 15 minutes. Record a sample. That beat—clear, rhythmic, inspiring—is success. You've accomplished genuine beat-making with professional equipment. Everything beyond this first session is deepening familiarity and exploring capabilities. You've already won. Keep playing daily.


Comments